
TRAVEL DIARY | Exploring Mid and North Tropical Queensland

The last month and a bit has been a big one - we’ve summited the top of the country, getting as far as Cape Tribulation, and are finally ready to say goodbye to the lush rainforests and humidity and head west to the red centre.
It’s safe to say we were pretty stunned as we adjusted to the size of Queensland’s massive coastline, let alone the entire country’s landmass, driving over 4000kms from Currarong to Cape Tribulation was a huge feat, especially in our old 2006 Iveco van! As expected, we hit our first repair ‘bump in the road’ which is two deteriorated radiator hoses that were causing the van to overheat particularly as we climbed any hills or mountains. It was only after we had caught a barge and climbed to the top of the isolated Upper Daintree’s peak that we had to pull over and realised just how dire the state of the engine parts were….it was a little hair raising as we were literally the furthest we could be from a heavy vehicle mechanic and no reception, but luckily a quick bush repair thanks to the local croc tour guide kept us going until we returned to Cairns.
Since it’s been a mammoth month I’m going to break down our main highlights and all our favourite places we’ve explored in a list below, it’s been a bit of a delayed wet season so we had to sacrifice a few places due to waiting out wet weather, but overall we’re pretty stoked with all the incredible places we’ve been lucky enough to visit!

K’Gari Island aka Fraser Island
We hired a 4x4 from Rainbow Beach and packed our tent and camping cooking gear and caught the 6 am barge over to Australia’s largest sand island, K’gari to spend 3 days exploring the rainforests and lakes that make up this special place. Driving along the endless strip of beach and through the roughly carved out roads felt like being in an adult theme park, with aqua clear freshwater lakes, huge sand dunes, and wild dingos keeping tabs on your camp. the three days we spent were full-on with adventure.
Lake Mackenzie was glistening and although a bit packed with tourists, we managed to wade our bags and sun shelter to a more isolated island around the bend for our own private beach experience. We camped under the stars and watched silhouettes of curious dingos pop their heads against the tent against the light of the full moon. The next day we setup and enjoyed the full afternoon drifting up and down the natural springs of Eli Creek, which flows fresh water 200 meters down to the ocean and is deep enough to float down over and over again. On our last morning we woke up at sunrise and hiked for half an hour up to the sand blow of Lake Wabby, a giant isolated sand dune in the middle of the island with views of the ocean, that then drastically drop down to the deepest lake on the island which makes for the perfect spot for a cool dip after a sweaty hike through the rainforest.
After finishing up our trip we returned to Rainbow Beach for a day of R&R before heading north to our last chance for surf, Agnes Waters.


Agnes Waters | 1770
In my last update, I mentioned just how wet we had copped it from traveling through Northern NSW and early QLD, sadly missing many of the main surf towns due to floods and dangerous debris in the ocean. Well, we finally made it to Agnes Waters, technically the last town on the East Coast before it’s considered too dangerous to surf/swim openly in the ocean thanks to crocs, stingers, and sharks, and of course, there is no swell to be seen. Although we were staying just 5 minutes from the beach, we only got in the water once, due to more rain and lack of surf, and then farewelled the coast to head further north. In our heads, we expected to be celebrating the final surf fuelled days here in the much-loved surf town, but unfortunately, it ended up with us being at our campsite reading books and drawing in the van! The highlight for us was mastering our damper recipe over the fire! It became our after-dinner staple with some butter and honey - so good!


Yeppoon | Byfield National Park
3 hours north of Agnes Waters is the lovely town of Yeppoon, gateway to the southern Great Barrier Reef and home to our favourite public pool or ‘lagoon’. We didn’t spend long in the town apart from the hours submerged in the infinity-like public lagoon which overlooked the town’s beach. Instead of eating at the local restaurant next door to it, we cooked up a BBQ in the van and enjoyed eating and lying in the weirdly dry QLD heat with lots of cool-off swims in the lagoon. We actually stayed 20 minutes up the road in Byfield National Park at the Upper Stoney Creek campgrounds. These accompany a stunning crystal clear water hole which is apparently high enough away from crocs, although there were still warning signs and also signs to avoid touching the floor of the creek due to poisonous stonefish. Despite the risks, the swim is worth the reward, considered icy cold water to Queenslanders, but just right for us!


Carmilla
Just two hours north but also the longest two-hour drive of our lives is the coastal country town of Carmilla. We spent the weekend at their beachside campground after driving for 2 hours without hitting the break once through rural central Queensland. At this point of the trip, the heat was getting so hot and dry that we suddenly understood the value and how truly essential an ice-cold XXX Gold beer could be. Carmilla was an odd spot, it introduced us to the extreme tides of northern Queensland, with the shoreline going almost a kilometer out to sea on low tide, leaving behind heavily corrugated banks of silty sand and millions of shells.


Eungella | Finch Hatton
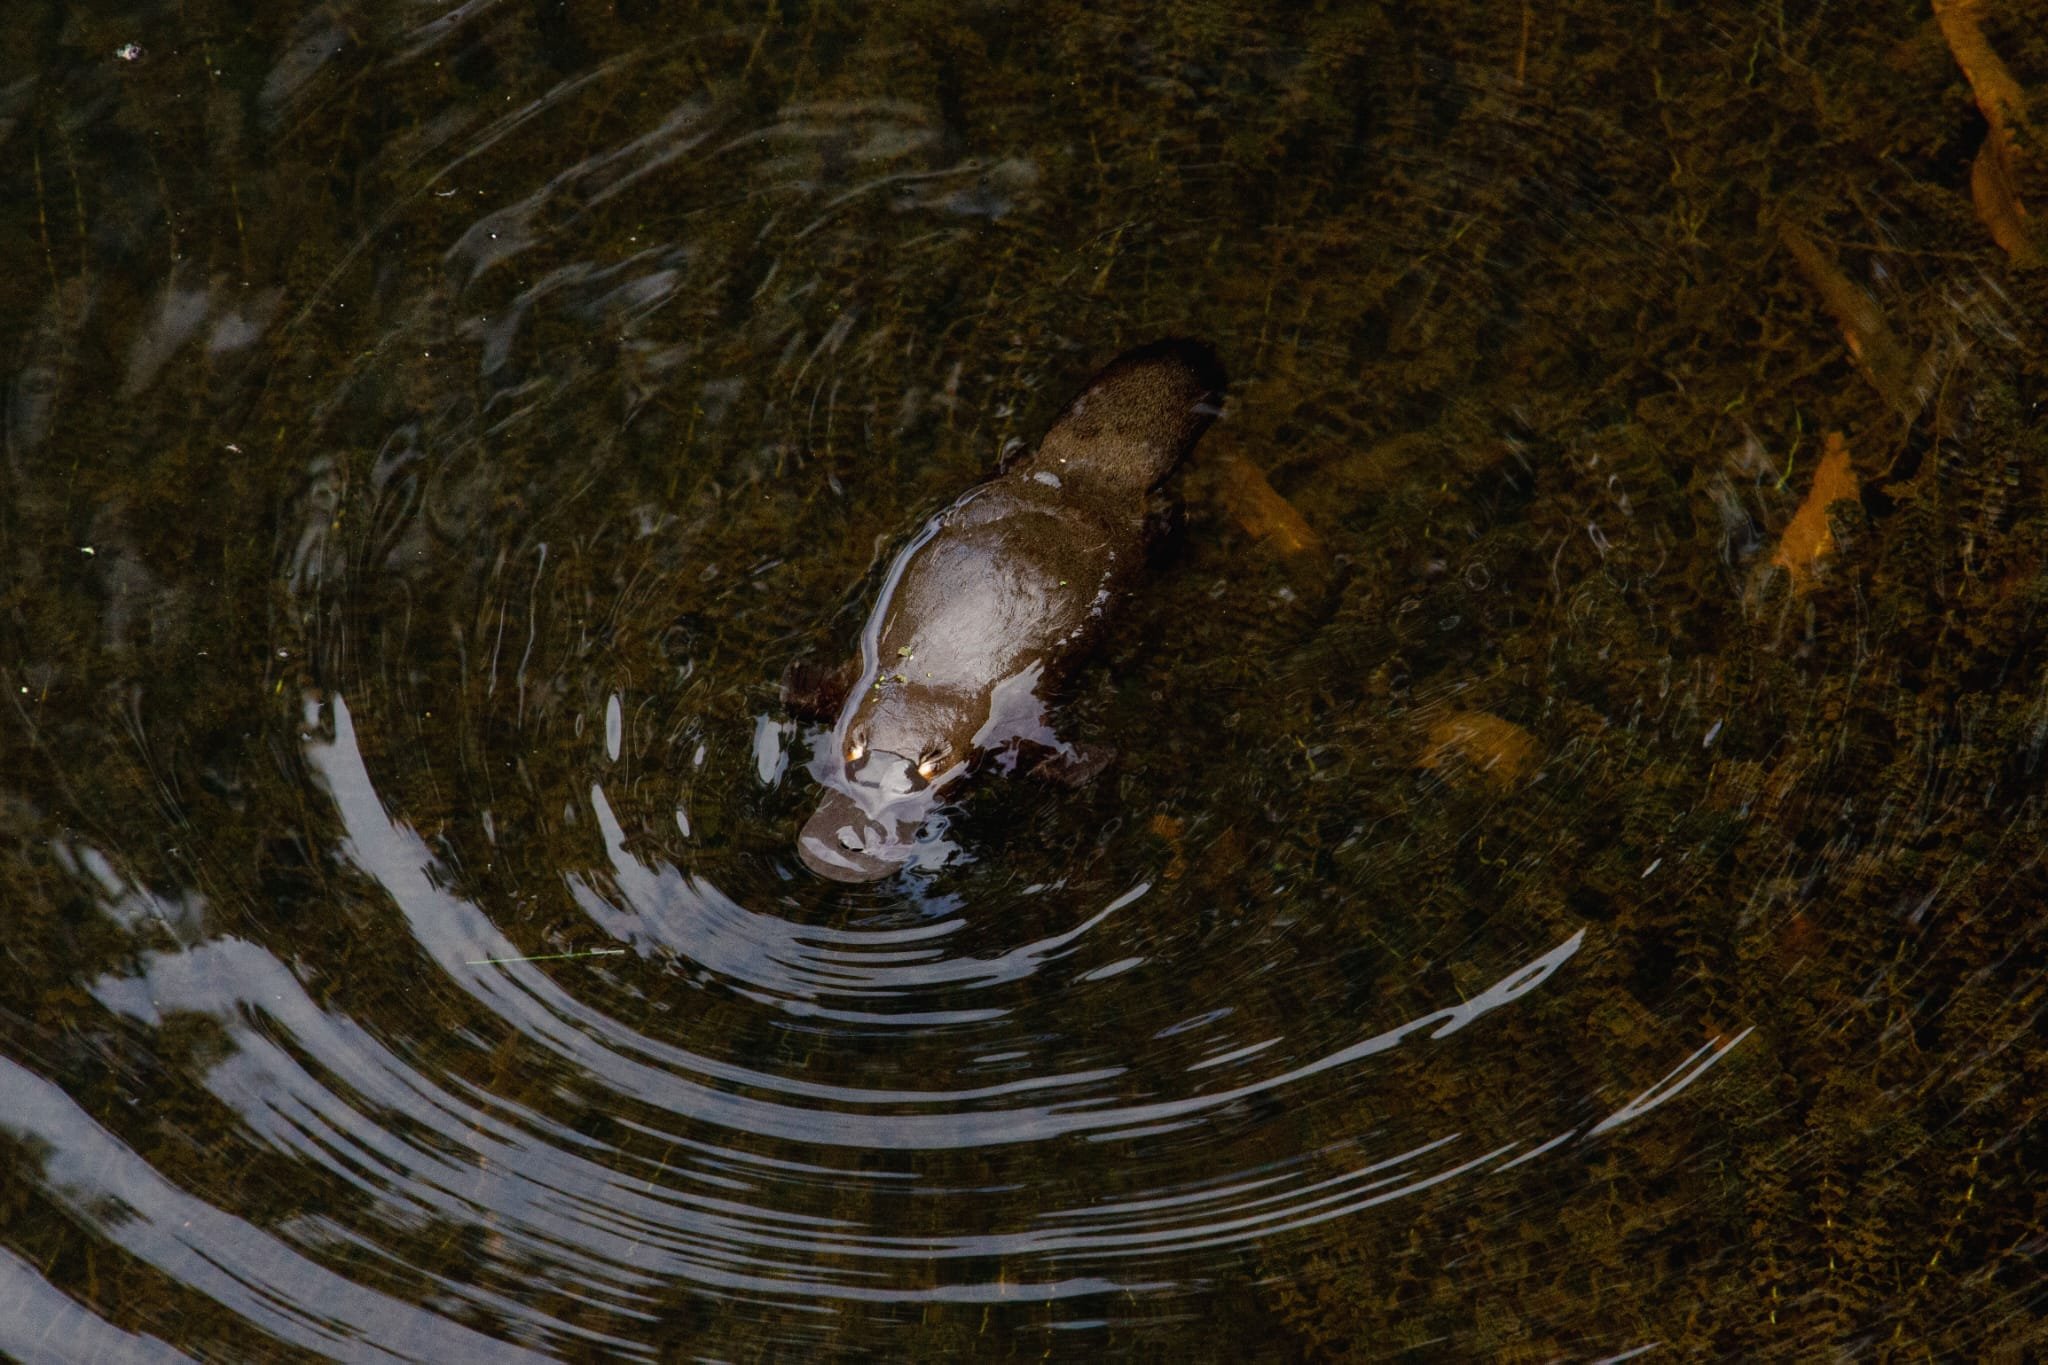
Since the van had been overheating, we knew we couldn’t climb the 600-meter mountain of Eungella, home to a huge colony of platypus, so after asking around several Facebook groups for van and motorhome travelers, we were recommended to take the back road via mining town of Nebo, up through its hills and slowly into Eungella. This is where we learned the importance of google satellite view - so when we travel down a different road to the main route, we can check if it’s sealed! In this instance - we did not. SO we ended up hurling the van down about 70kms of unsealed, dusty corrugated farm roads through private properties and huge mining sites to finally pull up to the mountain town of Eungella, and find our back window had been left open allowing 2 hours worth of dust to settle on absolutely everything. We spent another hour emptying everything and meticulously dusting wiping and cleaning bed linens to van walls. Just when we felt like we were at breaking point, we walked down to Broken River and spotted about 4 platypuses frolicking in the reeds, and suddenly it was all worth it.
The next morning, armed with zoom lens and binoculars we watched for hours as turtles, platypus, colourful butterflies, and even a snake enjoyed the River’s habitat, it was truly enchanting and left us feeling so calm and happy. We made the steep descent down the mountain and headed to the Finch Hatton Gorge, where you can hike 5kms to the Wheel Of Fire, which is the top waterfall, and where you can cool off in its many pools. It’s an incredible place, and if you’re brave enough to jump in and play amongst the different waterfalls and natural plunge pools then you can spend the whole day enjoying the QLD sun!
We went to spend the night at a place I read about on Facebook called Neem Hall, accommodation for vans, campers, and motorhomes with showers, laundry, and private river access also home to more platypus. Upon getting there we instantly fell in love with the grounds and the warm caretaker, Julie, and her fur family of three dogs, a three-legged cat called buddha, two giant American turkeys, and many chickens! What was meant to be one night turned into one week as we spent some well-earned rest time, taking time to enjoy not moving around and having a delightful home base with lots of furry company! It was so hard to leave and we’re grateful to have found such a great place to relax with such a friendly community.


Ayr
Instead of mentioning our brief time through Airlie Beach, I’d rather expand on the incredible place we discovered in the unassuming town of Ayr, en route between Airlie Beach and Townsville. This is where we were traveling through on Good Friday of the Easter long weekend and passed by the sign for Ayr’s Nature Display. Amazed it was the one thing in town that was open, we stopped and paid our $5 entry fee to find out what there was on display. Upon entering we were blown away by literally 100s of 1000s of insects, minerals, reptiles, and fish, which made up local legends Allen and Jess Ey’s collection. Who’s aim was to collect, record, and display nature and wildlife. They hand-built every cabinet and opened their display in 1966 which is run still today by their children. Its not just the incredible diversity in Ey’s collection, but how they designed and chose to display their specimens, creating patterns, sculptures, and complex arrangements - this place was just so amazing to immerse yourself in! We stayed for hours chatting to Lorrain and her husband about their family business, hanging on to every single wild story they told us about their encounters with Australia’s wildlife from huge 20cm cockroach armies crossing country roads, to saltwater crocs stealing neighbors from boats.


Atherton Tablelands
We finally moved inland from just north of Townsville, into the Atherton Tablelands, famous for its waterfall lined scenic drives and sighings of cassowaries. We visited several beautiful cascading falls and trekked through the dense rainforests and spotted a young cassowary, but were met with more bad weather - 5 days of nonstop rain forecasted meant we needed to find a spot to bunker down. So we settled in at Downfall Campground, Lake Tinaroo which was eerily quiet yet beautiful. For 5 days we were nestled inside the van watching rain cloud after rain cloud pass over the lake, occasionally breaking for air and to use the public bathrooms. We also really tested the extent of our power setup, putting 400 watts of solar on a 2000 watt lithium battery to the test - on the 5th day of not moving and no sun we officially ran out of power. Thankfully the morning after was a bright sunny day and so we set about driving to charge up the batteries again which thankfully didn’t take long!
By the time the weather died down we were desperate to get moving so made our way to Kuranda, a semi-hippy tropical town with a thriving arts scene, which was soo steamy after all the rain we literally were dripping with sweat from the moment we got up to the moment the sunset. Finally, we kissed the mountains goodbye and began our journey heading down the mountains and north to the Daintree and Cape Tribulation.


Cape Tribulation | The Daintree Rainforest
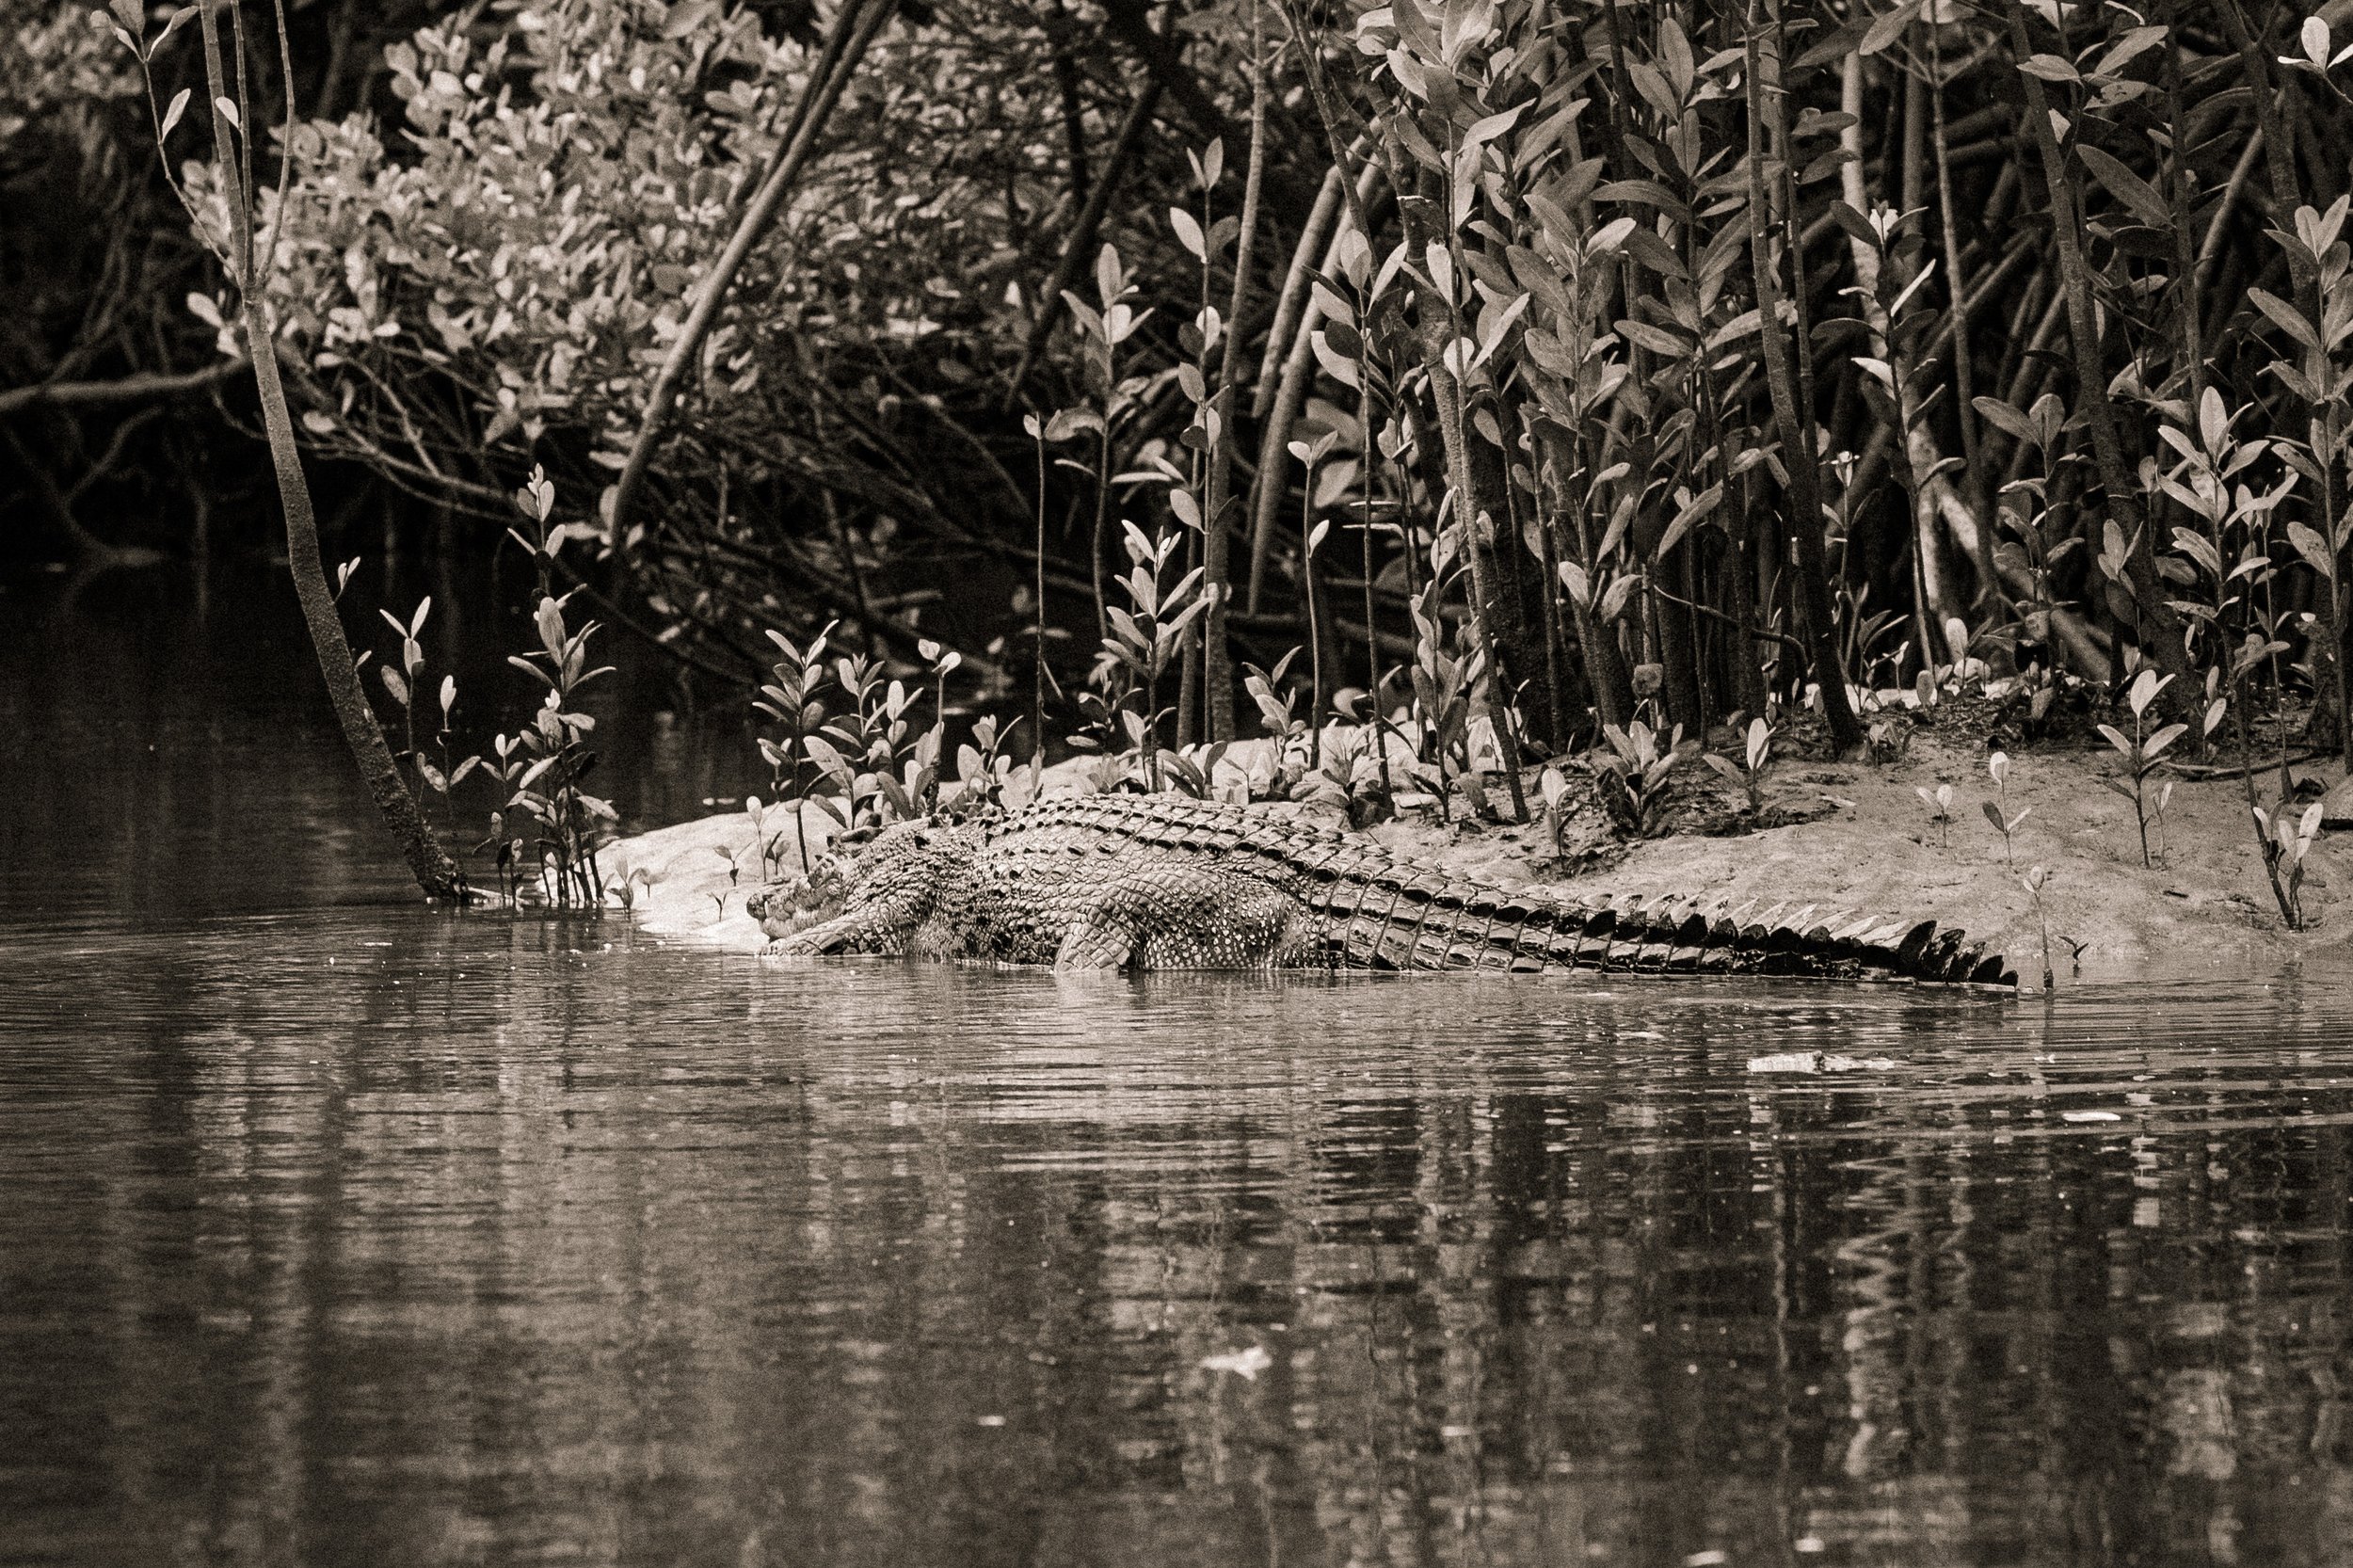
After driving from Port Douglas, where stopped to top up water, do some laundry and admire the fancy resorts peppered along the beach, we made our way into the dense dark tropical rainforest of the Daintree. We caught the barge to the upper Daintree and encountered our severely swollen radiator hoses on top of the 300-meter mountain - not going to. lie this was stressful, and dampened the mood over what we had hoped would be a really rewarding day - reaching the furthest point north on our trip! Although the problem made us a little weary, we did our best to immerse ourselves in the many boardwalks that wound through the deep lush rainforest and booked a river cruise to spot some Daintree crocs, which was really great. We spotted several large salties along with a few hidden juveniles in the mangroves. Apparently, the week before they had seen a croc carry a cassowary across the river in its mouth! Our campsite was on the edge of the World Heritage Rainforest where it met Noah’s Beach next to the World Heritage Great Barrier Reef, which was surprisingly quiet and isolated, making us feel very small and vulnerable to the huge, wild environment we were surrounded by.
After four days we bid the forest farewell with plans to finally get back in the water on the Great Barrier Reef!


Cairns | The Great Barrier Reef
We had picked up a copy of Marcia Langton’s Welcome To Country which is full of interesting travel recommendations for Indigenous Australia and found the tour group of Dreamtime Dive & Snorkel for the Cairns outer Great Barrier Reef which came fully catered with first nation seafarers and a marine biologist on board who also led us on a snorkel safari. It was such a great day trip and worth the wait, especially since we got to meet up with our mate Sidney. We were all blown away by the size and complexity of the reef, and just how many fish there were. We snorkeled in two different locations, and I tried my best to try and capture the beauty and colour with my phone in a protective case.
Back on land, we enjoyed Cairn’s massive weekend Fruit & Veg Market, Rusty’s where we stocked up on lots of tropical fruit, and also finally got our radiator hoses booked in for repair. We’re currently waiting for four days to get the repairs done, just south of Cairns in Mission Beach. With hopes of spotting some cassowaries, we’ve run into more rain so are back spending most days in the van with the occasional beach walk between bursts of tropical rain. Fingers crossed if all goes well we will be back on the road by the end of the week heading west to Alice Springs!


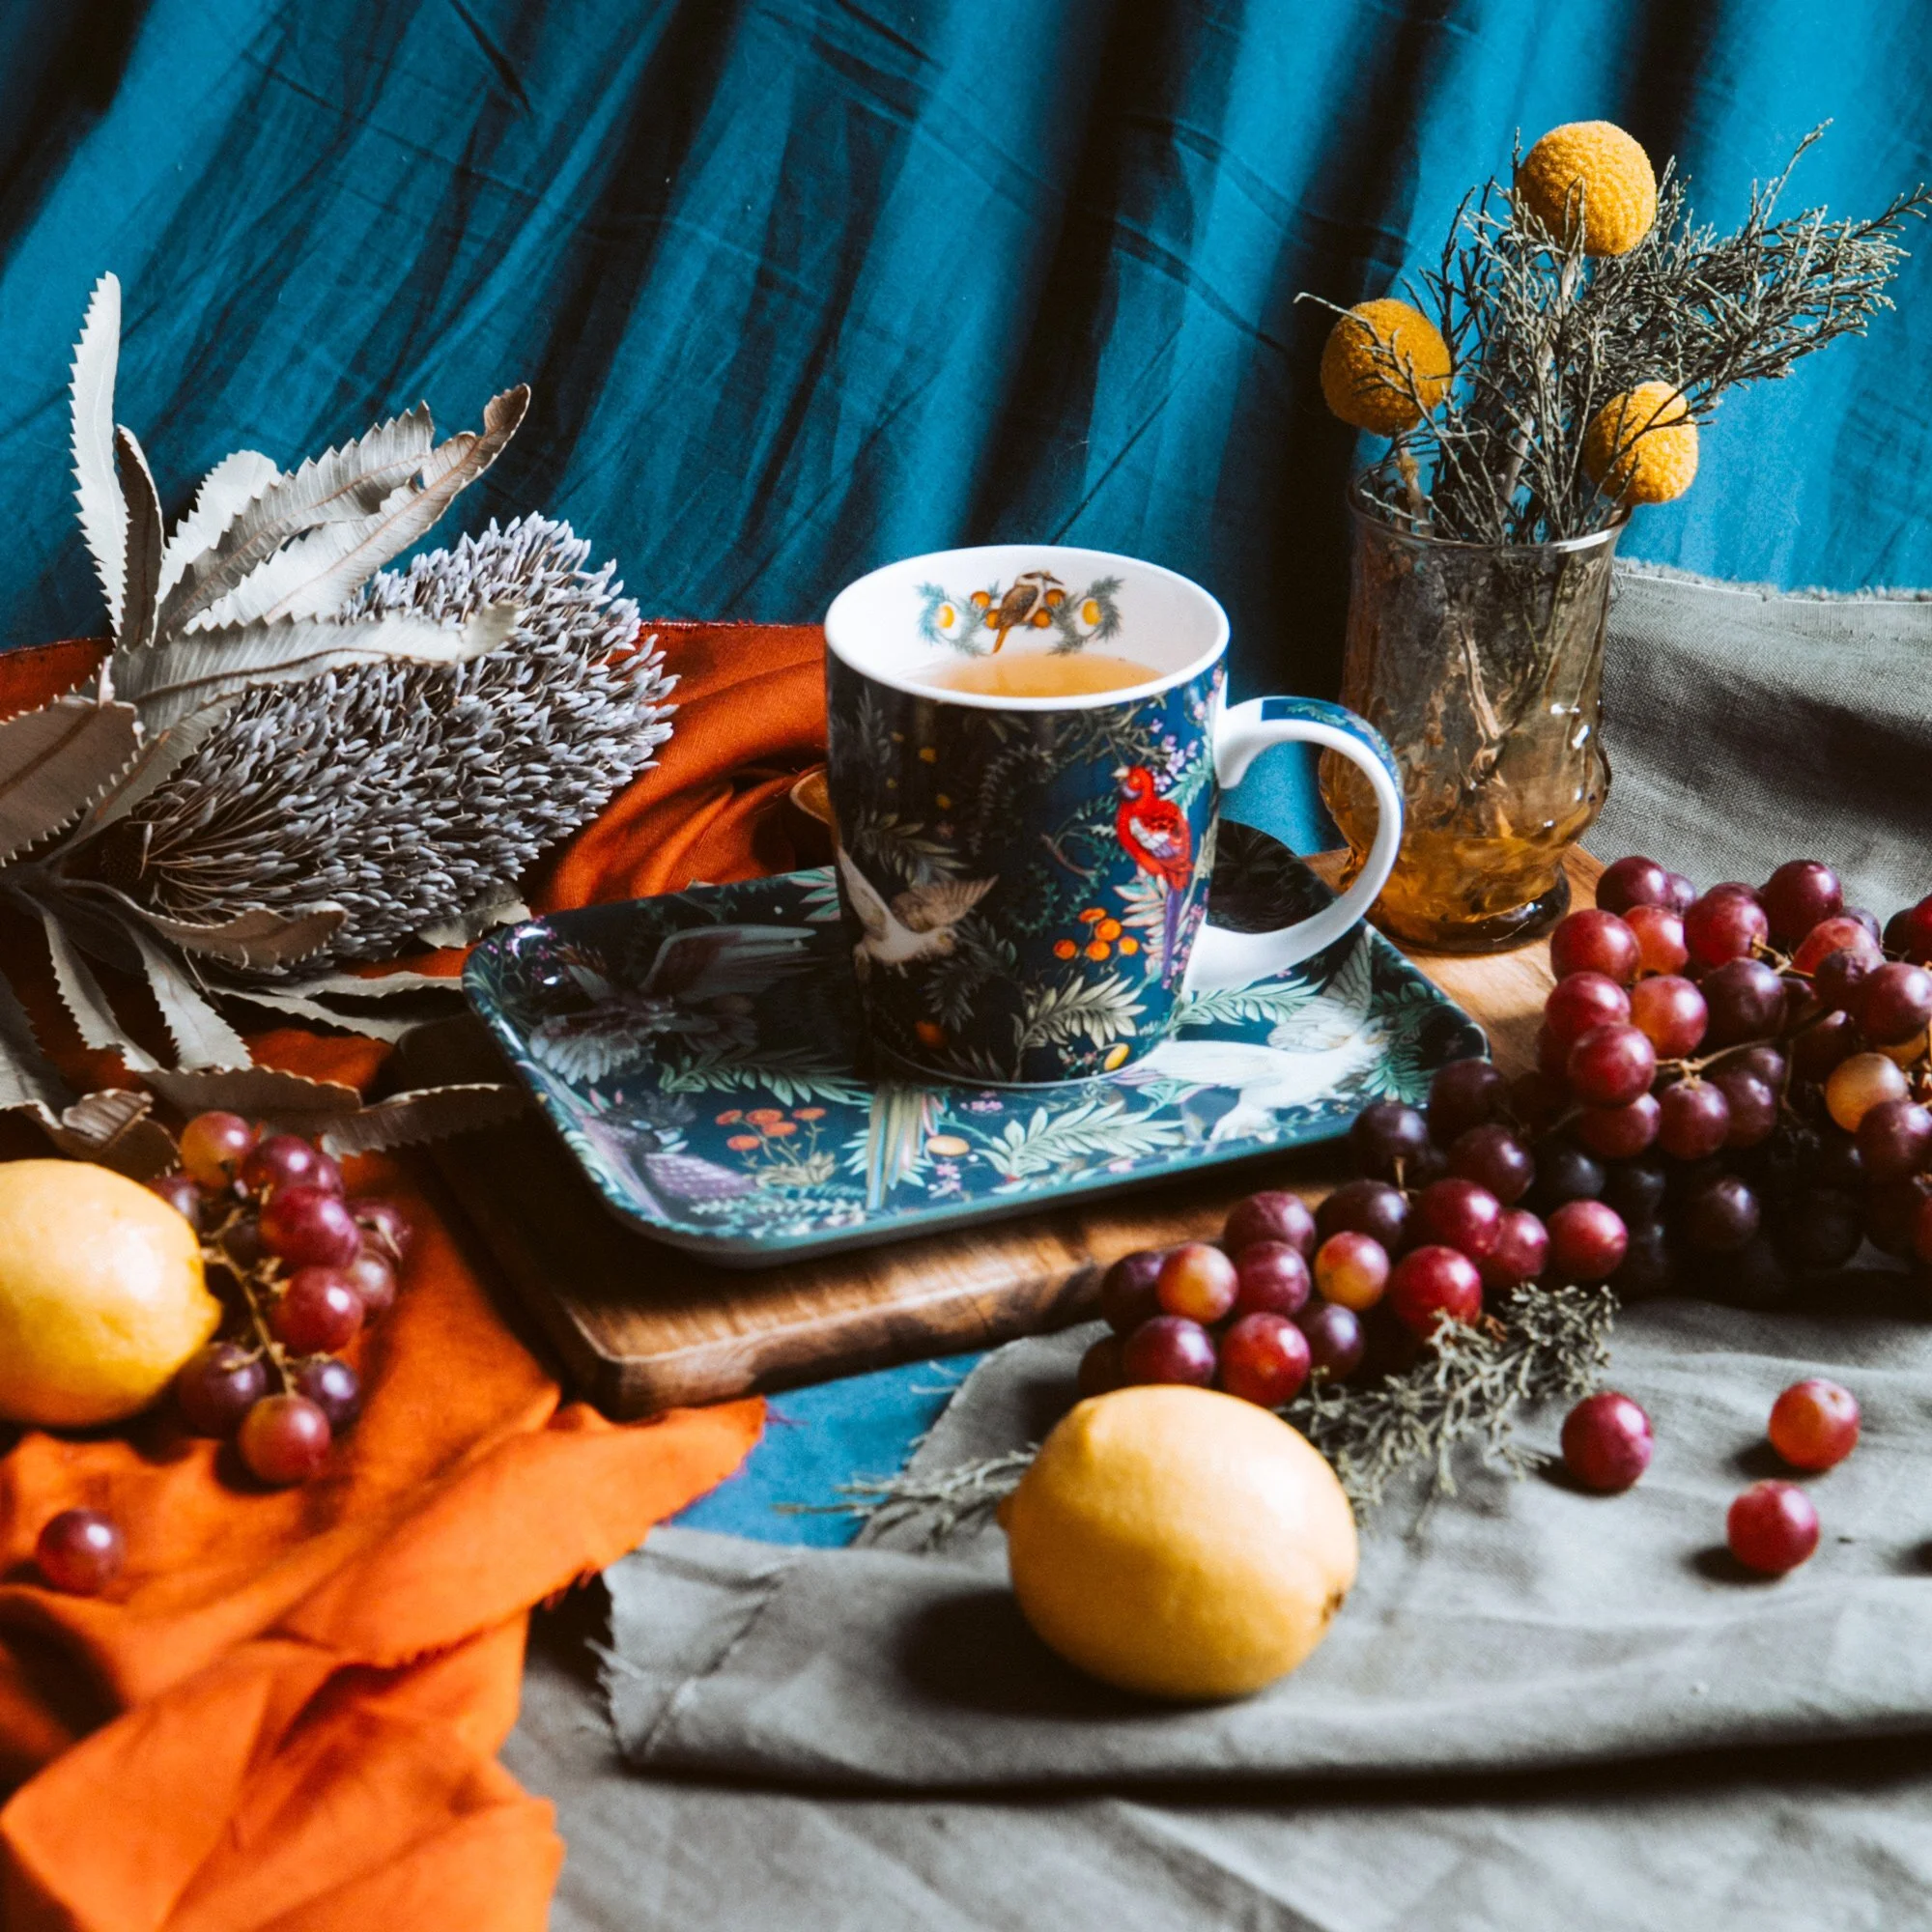
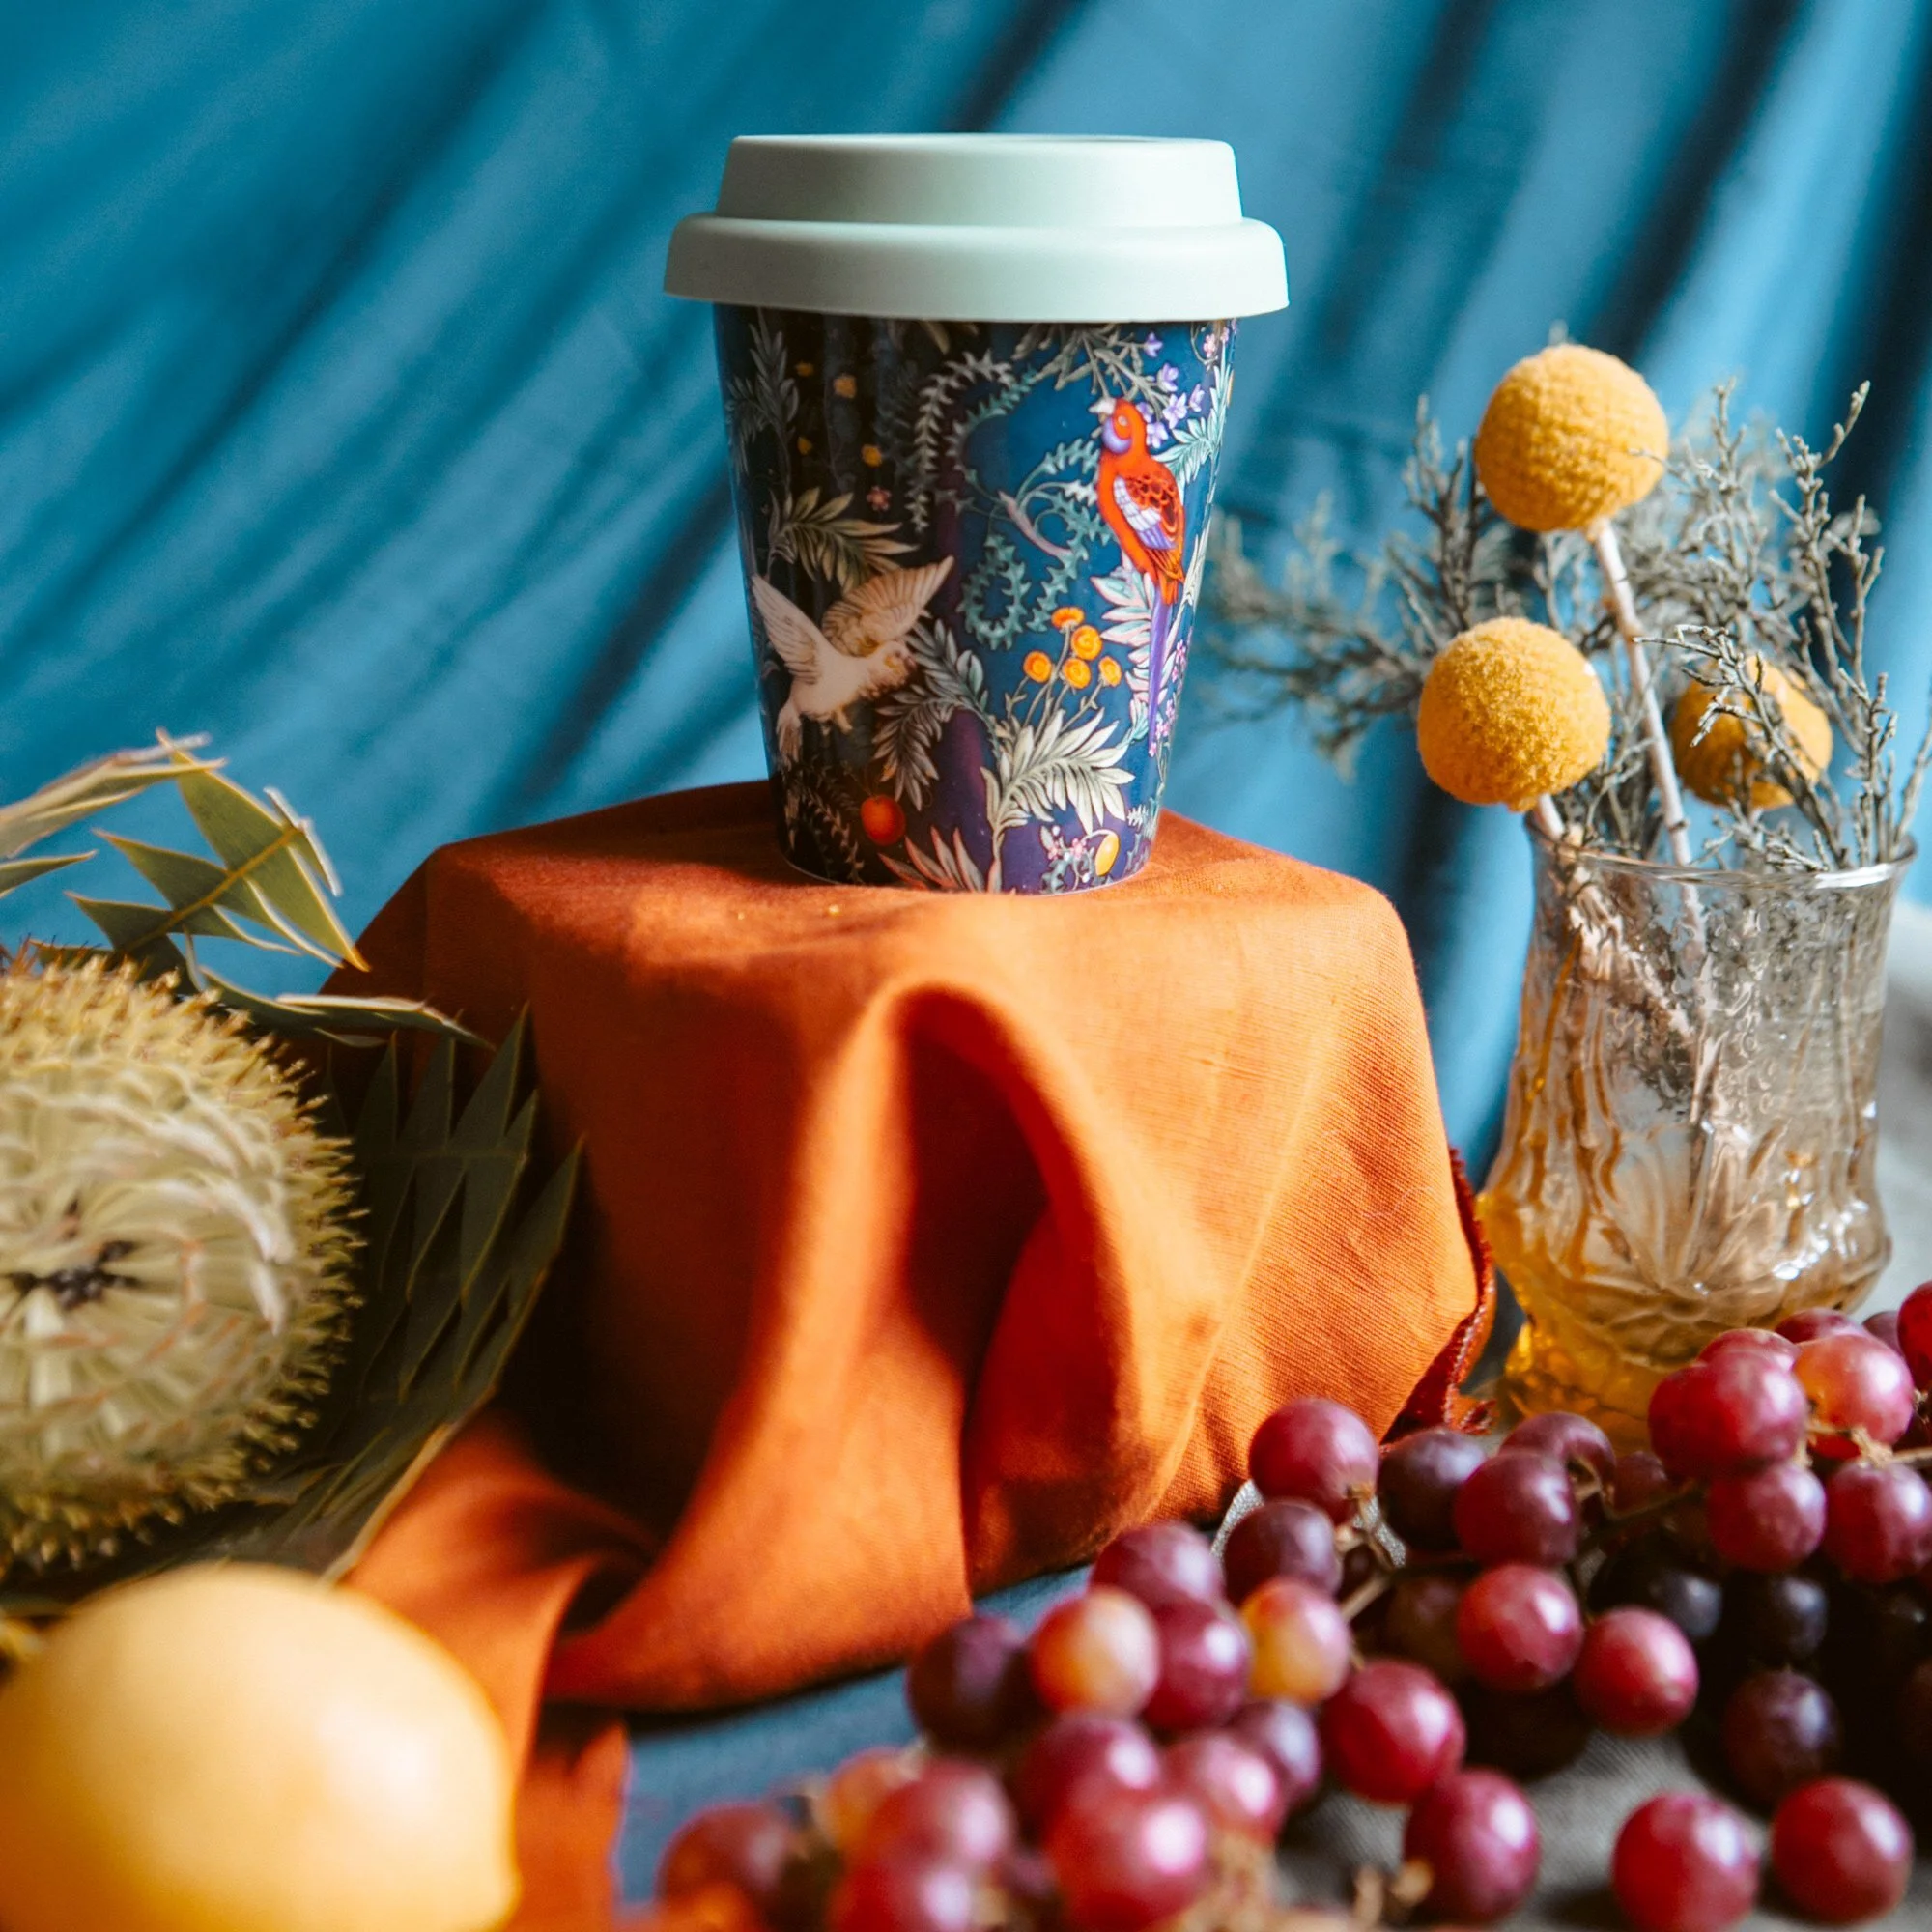
EUNGELLA | Illustrating the elusive platypus
We drove for 3 hours over unsealed roads to climb through the back of the mountain town of Eungella in hopes of seeing the elusive platypus. After 5 minutes of looking across the river, a cluster of bubbles formed and suddenly up popped this lil guy along with several of his friends! We stayed here for hours watching them feed and frolic until it was dark, hands down one of the best afternoon's of our life.


Naturally, after several hours of staring at all the wonderous wildlife emerging from the dark waters and rainforest, I started dreaming up a design of ripples, bubbles, and all the majestic wildlife we had witnessed. For the first time all year the inspiration I’d been searching for finally hit.
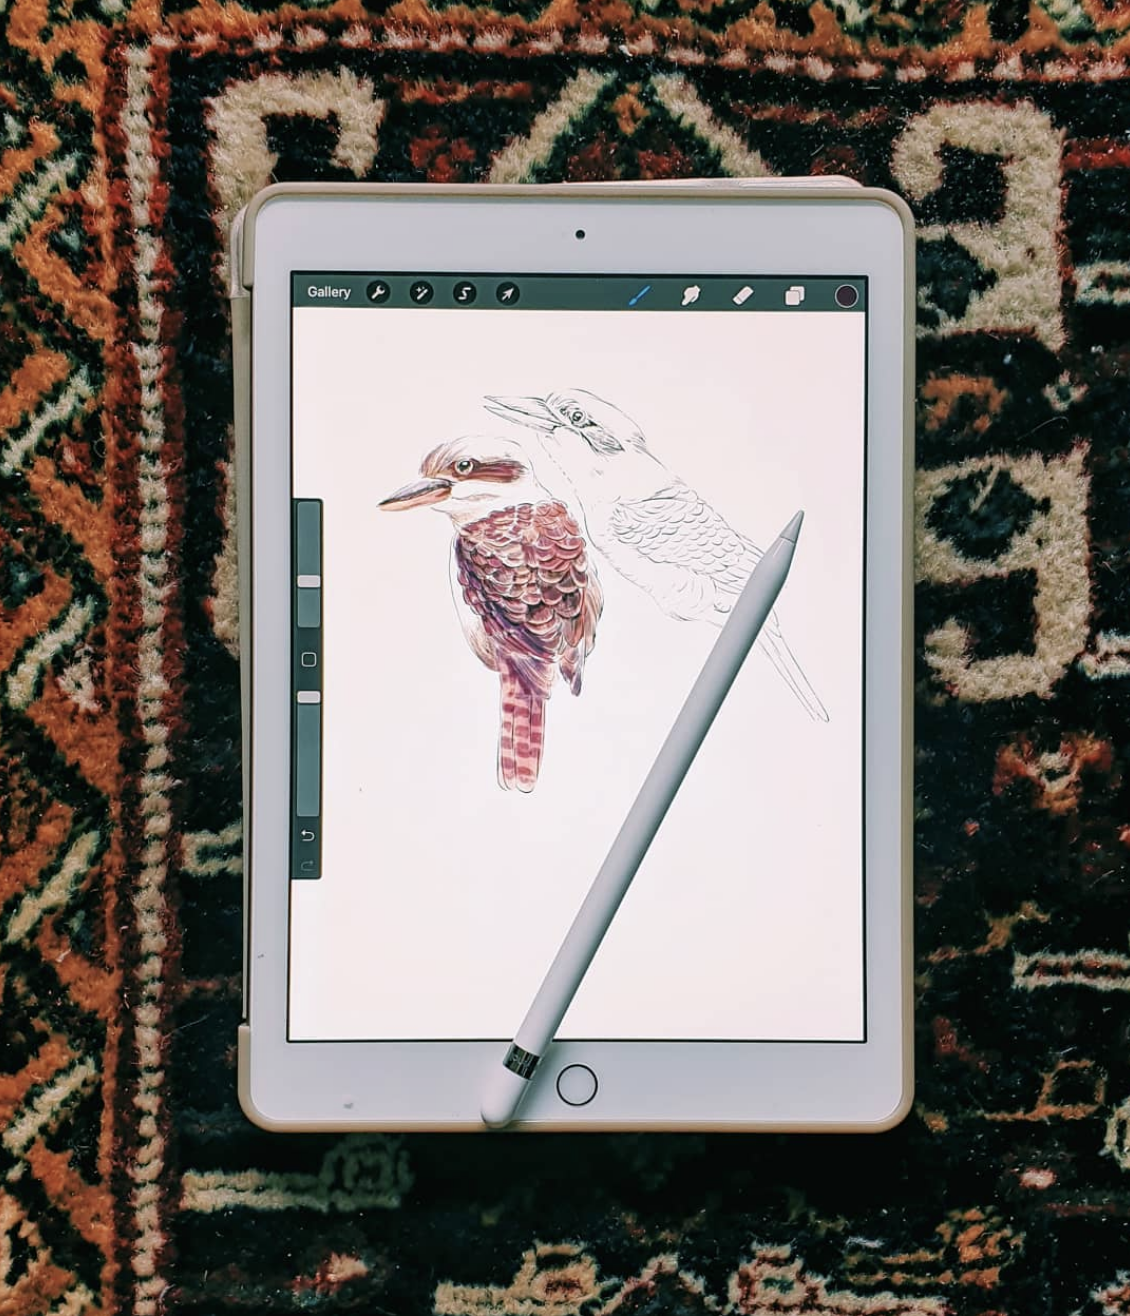
So I sat down, pulled out my iPad, and started sketching. I knew I wanted to include some pops of colour in the design and felt the iconic QLD Ullyses butterfly along with these stunning electric blue dragonflies that lingered along the water’s edge would make for a rich contrast to the muted colour of the reeds and platypus.
My intention was to create a design that ebbed and flowed like the platypus and ripples in the river so I tried to emulate that by hiding the repeat and guiding the eye through reeds and amongst the surface of the water. I also wanted to pair them with a rich dark background to reflect the evening light on the river and amongst the rainforest.
After working out all the different elements I wanted to use, I airdropped them to my mac and set about laying them out in Photoshop. I know you can do pattern making in Procreate but Photoshop just feels more flexible for me especially when creating patterns. After a day of playing around with arrangements and colour ways I finally settled on the design below. Let me know your thoughts!

TRAVEL DIARY | The First Month
It’s already March and 2022 has proven to have been a VERY busy year for us. We moved out of our home in the South Coast, got married, and have now moved into our self made camper van, and are currently heading north on our year-long honeymoon around Australia.


The plan for this trip is to immerse ourselves in nature, get inspired, explore and create as much as we can. I’ve packed paints, sketchbooks, and all sorts of mediums along with my camera gear neatly into the van next to Cristian’s guitar and carefully selected surfboard quiver. I hope to capture where we go and what inspires me. It’s been about two years in the making and we’re so excited to finally be on the road!
Our route will take us north from Sydney, via the Northern Rivers into Queensland, up around to Northern Territory, with a dip down to the red center, and then to the left through to Western Australia, then hug the coastline down and around to South Australia, Victoria and finally scoot over to Tasmania before arriving back in New South Wales.
It’s the end of week three and we’ve made it into Queensland after a two-week stint just south of Coffs Harbour after being forced to bunker down in Urunga, waiting for Brisbane and the Northern Rivers to stop flooding after a catastrophic amount of rain has soaked the region for the last two weeks. This also happened to be the first week of hitting the road so we’ve gone straight into the thick of it, discovering a couple of small leaks and coming to terms with living in a small space. This restructured our plan as we ended up hanging in Scotts Head (which was our favourite place so far) waiting for some admin tasks to be finalised and also waiting for the rain to give up before we could pass through Northern Rivers.
Since leaving home we’ve stopped off at Mungo Brush next to Myall Lakes which led to us seeing dingos around our campsite about 24 hours into our trip. Then onto the beautiful town of Seal Rocks where we patiently waited for a 2-meter python to cross the street after watching big manta rays frolic in the bay. Finally, we reached Crescent Head where we enjoyed pods of dolphins jumping and surfing the famous waves.
Instead of staying Coffs Harbour, we opted for the surfing Sikh town of Woolgoolga and neighboring town, Mullaway. These two places were soo beautiful and had a huge swell hit the shores as we explored them. Some photos down below of one of the brave locals going out in 5 metre waves. Then of course more rain hit and so we continued north to try escape it up in Queensland.
All the rain forced us to really put into use the comforts we’d installed in the van when originally designing it to resemble our living room! Our L shape lounge got a good workout as we spent most nights watching Netflix on the pull-down projector, and its been great having the space to stand up and walk around in the van. I’ve been lucky enough to have the majority of meals cooked by Cristian who has been smashing out shakshuka, Indian dahl curries, lots of new recipes and countless cooked big breakfasts on our Companion gas oven and cooker in our kitchen setup and its been just as good as cooking at home!. We’ve also been storing our weekly veg and condiments n a 62 litre Dometic upright fridge which is surprisingly deep and holds a 6 pack along with all your essential fridge staples so pretty ideal for us. Our favourite meals have been the ones we can cook on the open fire when staying in the bush - jacket roast potatoes and BBQ, buttered charred corn, veg and burgers have never tasted so good!
Now we’re in Queensland the sun has started to show its face a little bit more so we’ve headed to the Sunshine Coast to soak up as much vitamin D and sea as possible with plans to head to Fraser Island for some 4x4 adventures then make our way north to Cairns!
I’ll leave you with some of the highlight reel from our first month and hopefully will be able to keep this up as we travel along!
x


SHACKS | MY CREATIVE PROCESS

Inspired by the nostalgic charm of the weathered Australian shack, I wanted to illustrate a collection of intricate little shacks that embody a sense of Australian antiquity and shabby charm.
It began with a rainy day in March (I think it had actually been raining for almost 2 weeks straight!) and so I was on a deep dive into Instagram looking at all these gorgeous places on the Shacks Of Tasmania account. I opened my sketchbook and with a biro pen, started sketching all these little houses with their retro shapes and federation-style finishings. As the sketch grew I added in some directional grasses and docile animals, hashing out the idea of nature reclaiming the land.
Over the next few weeks I collected lots of photo references including some of my favourite little shacks from the seaside town of Currarong and got to work on illustrating them on my iPad. Once I had plenty of illustrated shacks I started to experiment with how I could weave them all together using the beautiful velvet grasses you’d often find across the planes of Tasmania and regions in the Snowy’s. I love those mossy green and brown tones with pops of rusty oranges and silvery purples. I also wanted to illustrate little nooks like ponds and creeks, and pockets of pretty wildflowers you would happen to find when exploring these wild places. All of these combined along with some native Australian animals and birds and I finally had all that I needed to create the final composition.
This was the hard part! I had over 8 little shacks that needed to look like they shared the same landscape but would also work individually on their own when you focused in on it. Using the rolling grasslands, creeks, ponds, and sandy tracks I had illustrated, I created a seamless land that housed my rustic little shacks. I absolutely loved getting stuck into the details of each setting and wanted to make sure each segment was unique but organically flowed into the next.
My favourite illustrations are those that really pull the viewer in and force you to get lost in the landscape. That was my goal when finalising my Shack composition. I hope you can get lost in the design and discover little hidden animals, spot the odd Kookaburra or hidden Kangaroo (yep try count all three!) and most of all I hope this envokes a sense of nostalgia for those of you have fond memories of your favourite cabins and shacks and a sense of appreciation for the beauty of the Australian landscape.

You can shop my Shack print in A2, A3 and A4 sizes below.


WHERE TO SHOP MY FABRIC RANGE
I'm so excited to finally share a list of some of the stockists who have my ABC botanical fabric range available!

I'm soo excited to finally share a list of some of the stockists who have my ABC botanical fabric range available!
I'll try and update this list as I find more but for now, you can buy my range of illustrated fabrics through the links below:
STOCKISTS
WHOLESALE ORDERS
If you stock my fabrics feel free to let me know and I’ll add you to my stockist list!


FREEING UP MY ILLUSTRATION STYLE BY USING PROCREATE ON MY IPAD
When I first made the move from the inner suburbs of Sydney to the tidy coastal town of Bulli, I knew I was signing up for 3 hours or commuting every day as I worked full time in the city. I sold the idea to myself as 'optimum work time’ to focus on my freelance jobs and to explore any personal work I wanted to get stuck into. I usually complete the majority of my illustrations on photoshop using my Wacom Cintiq and MacBook pro, so in order to make this more compact and suitable for on-the-go travel, I looked into purchasing an ipad, apple pencil and procreate.
The total cost of my new on-the-go setup was around $650
iPad 6th Gen 9.7" WiFi 128GB Gold - $519 AUD
Apple Pencil 1st Generation - $138 AUD
(Both purchased from Officeworks)
and the one off cost of the Procreate App which was $9.99 USD.
Although it seemed a little steep, I figured that all the additional work I could get done on my commute using this setup deemed it a worthwhile investment for myself!
Adjusting to using Procreate was a little challenging at first. Seeing as there are about 100 ways to create different styles and kinds of illustration in photoshop with unlimited layers, Procreate gives a more stripped back, refined interface where you simply select your brushes and colours and work within a limited layer setup and follow the intuitive drawing tools and shortcuts the program offers.

The first project I worked on with just my Ipad & Procreate was this wedding invitation for the lovely Megan and Joshua.
When working on commissions and briefs, I like to have a thumbnail sketch of how the whole design will work, then I’ll illustrate elements on separate files nice and large (a4-a3 in size) and then bring them all together on the master design document to build up my composition. This is essentially the approach I took with their invitations, and I really loved how easily I could pull it all together form the comfort of my lap!
Thankfully Procreate allows you to export your files via airdrop as a variety of different file types including PSD so I exported the final the design as a PSD and finished off adding the text in Photoshop, exported it as a PDF and off it went to print!


The more I played around with Procreate, the more I found myself rediscovering the joy of drawing again. I don’t know about you but I’ve always been a bit funny with sketchbooks, being too scared to make a bad mark or ruin a page or ‘flow’. With my ipad I love the ability to whip it out (providing I’ve remembered to charge it!) and enjoy the endless ability to create whatever I want wherever I want!
The above illustrations were from my backyard as an observation sketch using Procreate’s pen liner brushes which I then decided to colour in using some new custom brushes I purchased from Bardot Brush (Highly recommend as they’ve got great water colour washes and textures for building up organic gritty details!).

Eventually I found myself opening up Procreate and losing several hours in sketch-land where I would recreate little nooks and compositions around my home as I got more and more comfortable with how the brushes flowed and little tricks like flipping and rotating elements, playing with layer opacity and clipping masks and most of all just really enjoying the process!

What I really love about Procreate is how much its allowed me to free up my drawing style. Don’t get me wrong, I’m still very much a stickler for detail BUT now I can also turn that side of my brain down a notch and appreciate the full spectrum of colour available at my fingertips to to explore a more impressionist style of mark making.
Recently I’ve found myself sketching landscapes and my favourite places I like to visit, which a year ago would have probably taken me a month to plan an attack on how to create, but now can be done from the comfort of my lap on my couch, or on a blanket in the grass, or recently balanced on my knees off the side of a houseboat.

I received a lot of positive feedback when I started to share this new ‘free’ style with people which gave me the encouragement I needed to turn them into prints! I hope to keep adding to this new category of art which I’ve setup in my shop under the LANDSCAPES category and one day hope to fill it up with all my favourite places and destinations I love best!
You can shop the first three prints below and keep your eye on my instagram and newsletters for more to come!


SHOP SMALL | NATURE-INSPIRED GIFT GUIDE
I’ve always loved gift-giving for friends and family so this year I thought it would be nice to share some of my favourite Australian makers and creators who create beautiful quality-made, nature-inspired products. By shopping small this Christmas season you’re not only gifting carefully created presents but also giving the gift of support to small businesses.

I’ve always loved gift-giving for friends and family so this year I thought it would be nice to share some of my favourite Australian makers and creators who create beautiful quality-made, nature-inspired products. By shopping small this Christmas season you’re not only gifting carefully created presents but also giving the gift of support to small businesses.
Andrea Ward Silk Scarves
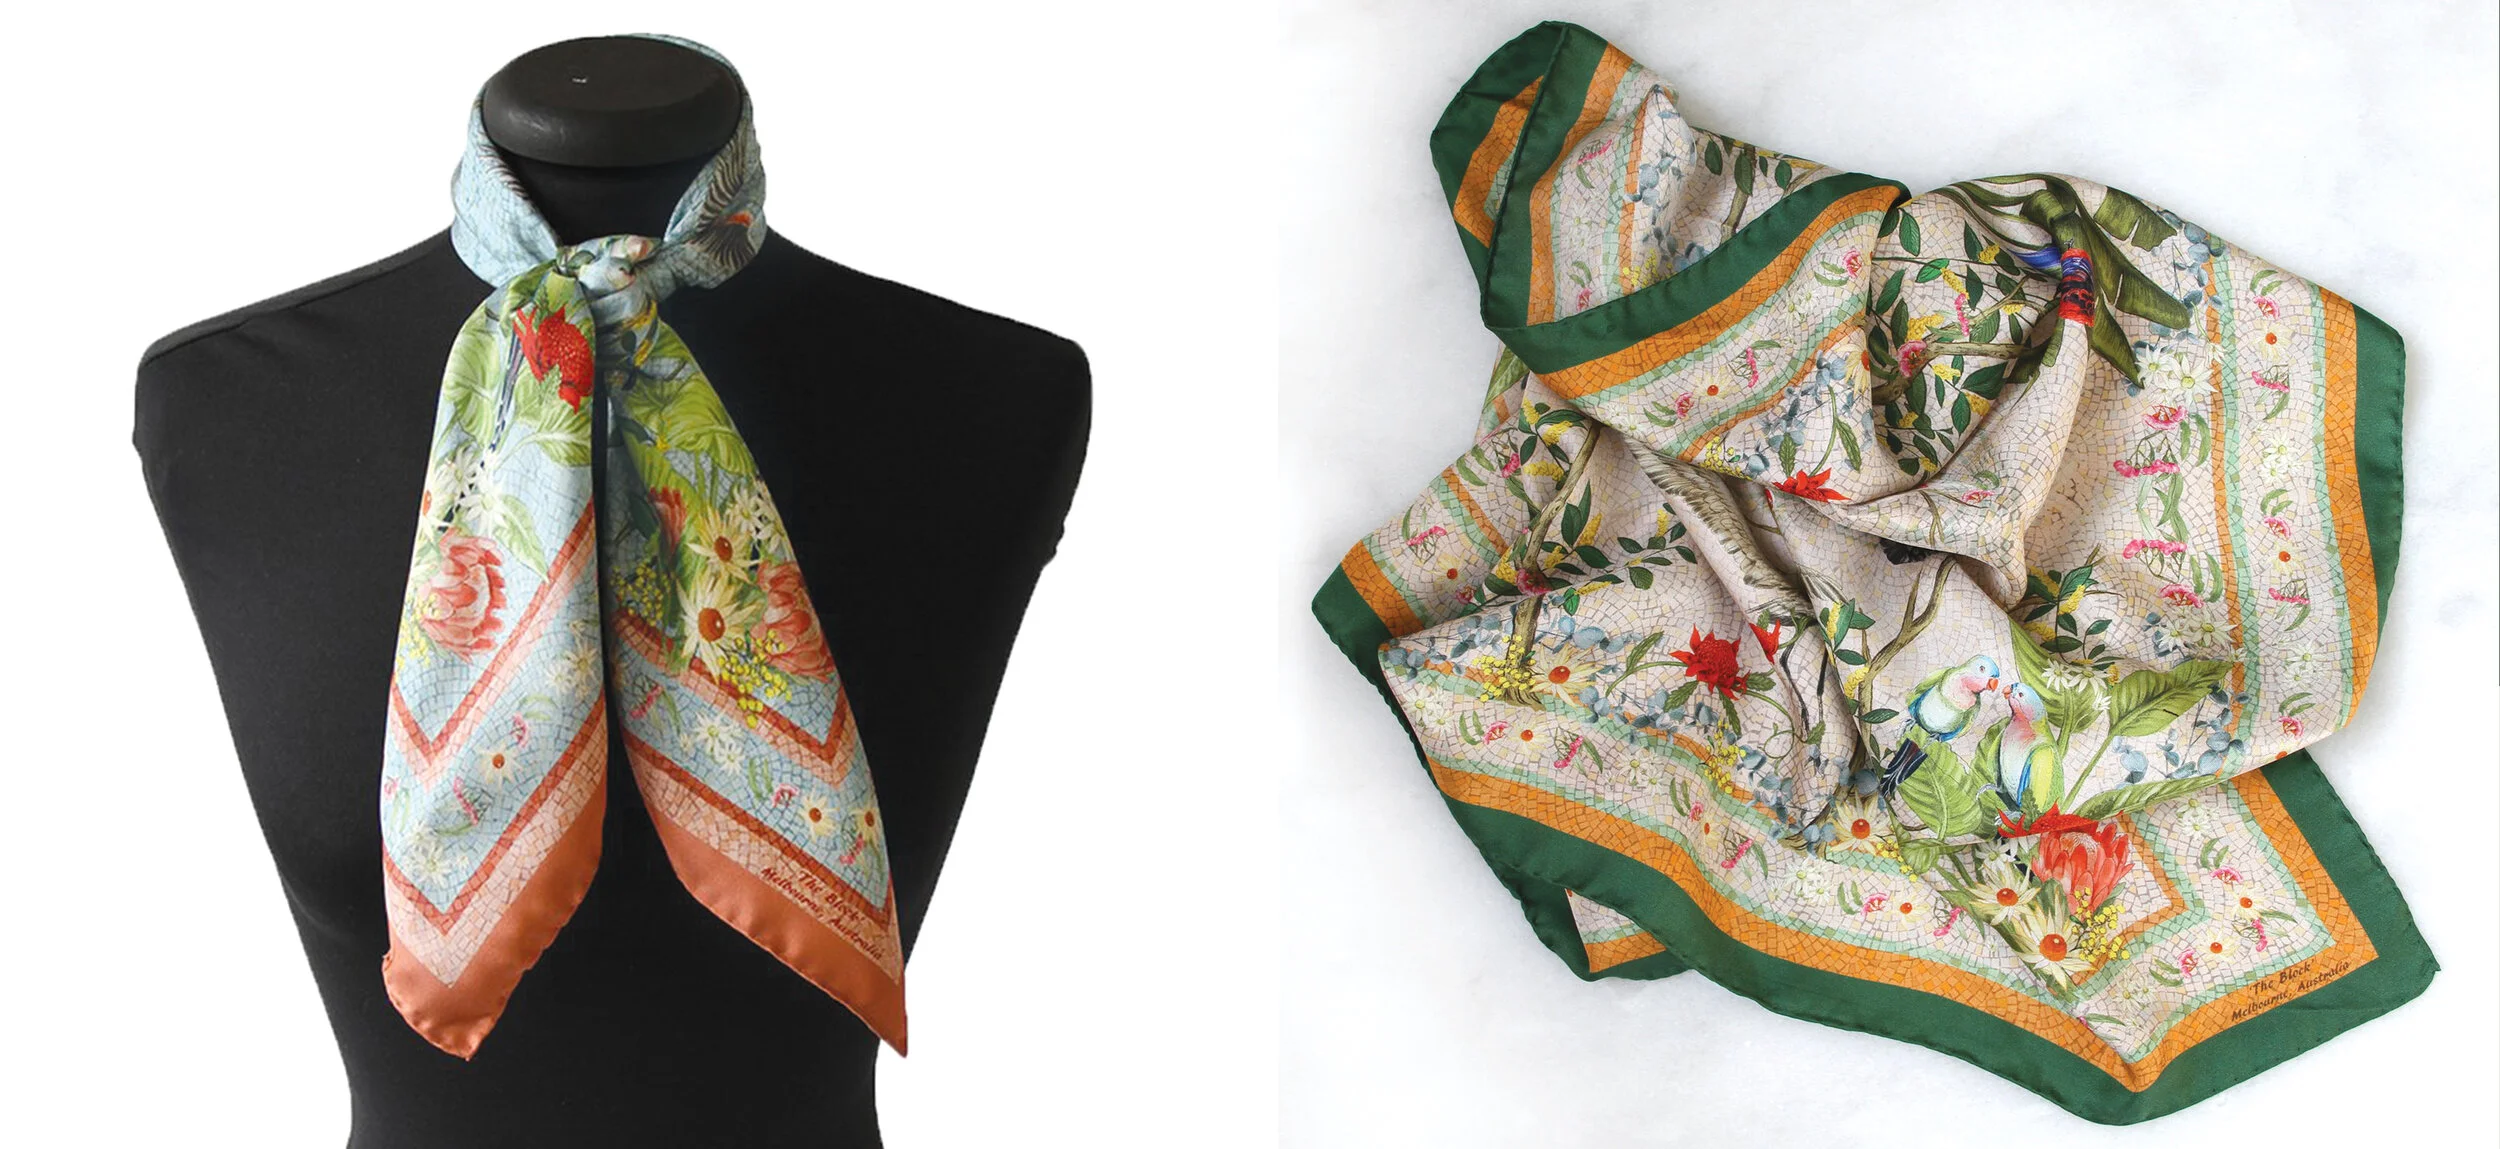
Andrea creates beautiful quality silk scarves on 100% Italian rolled silks and recently asked me to illustrate the Regeneration range, inspired by Australian florals and birds whilst incorporating the heritage mosaic tiles of Melbourne’s iconic Block Arcade.
The range features three colourways & sizes: Medium 70cmx70cm in Tapioca and Fog and Small 54cm x 54cm in Mango. They come beautifully packaged in a gift box and make a great gift for anyone who appreciates art and a bit of Australian architectural history!
Prices from $99
Buy Andrea Ward Silk Scarves
Andrea Ward on Instagram
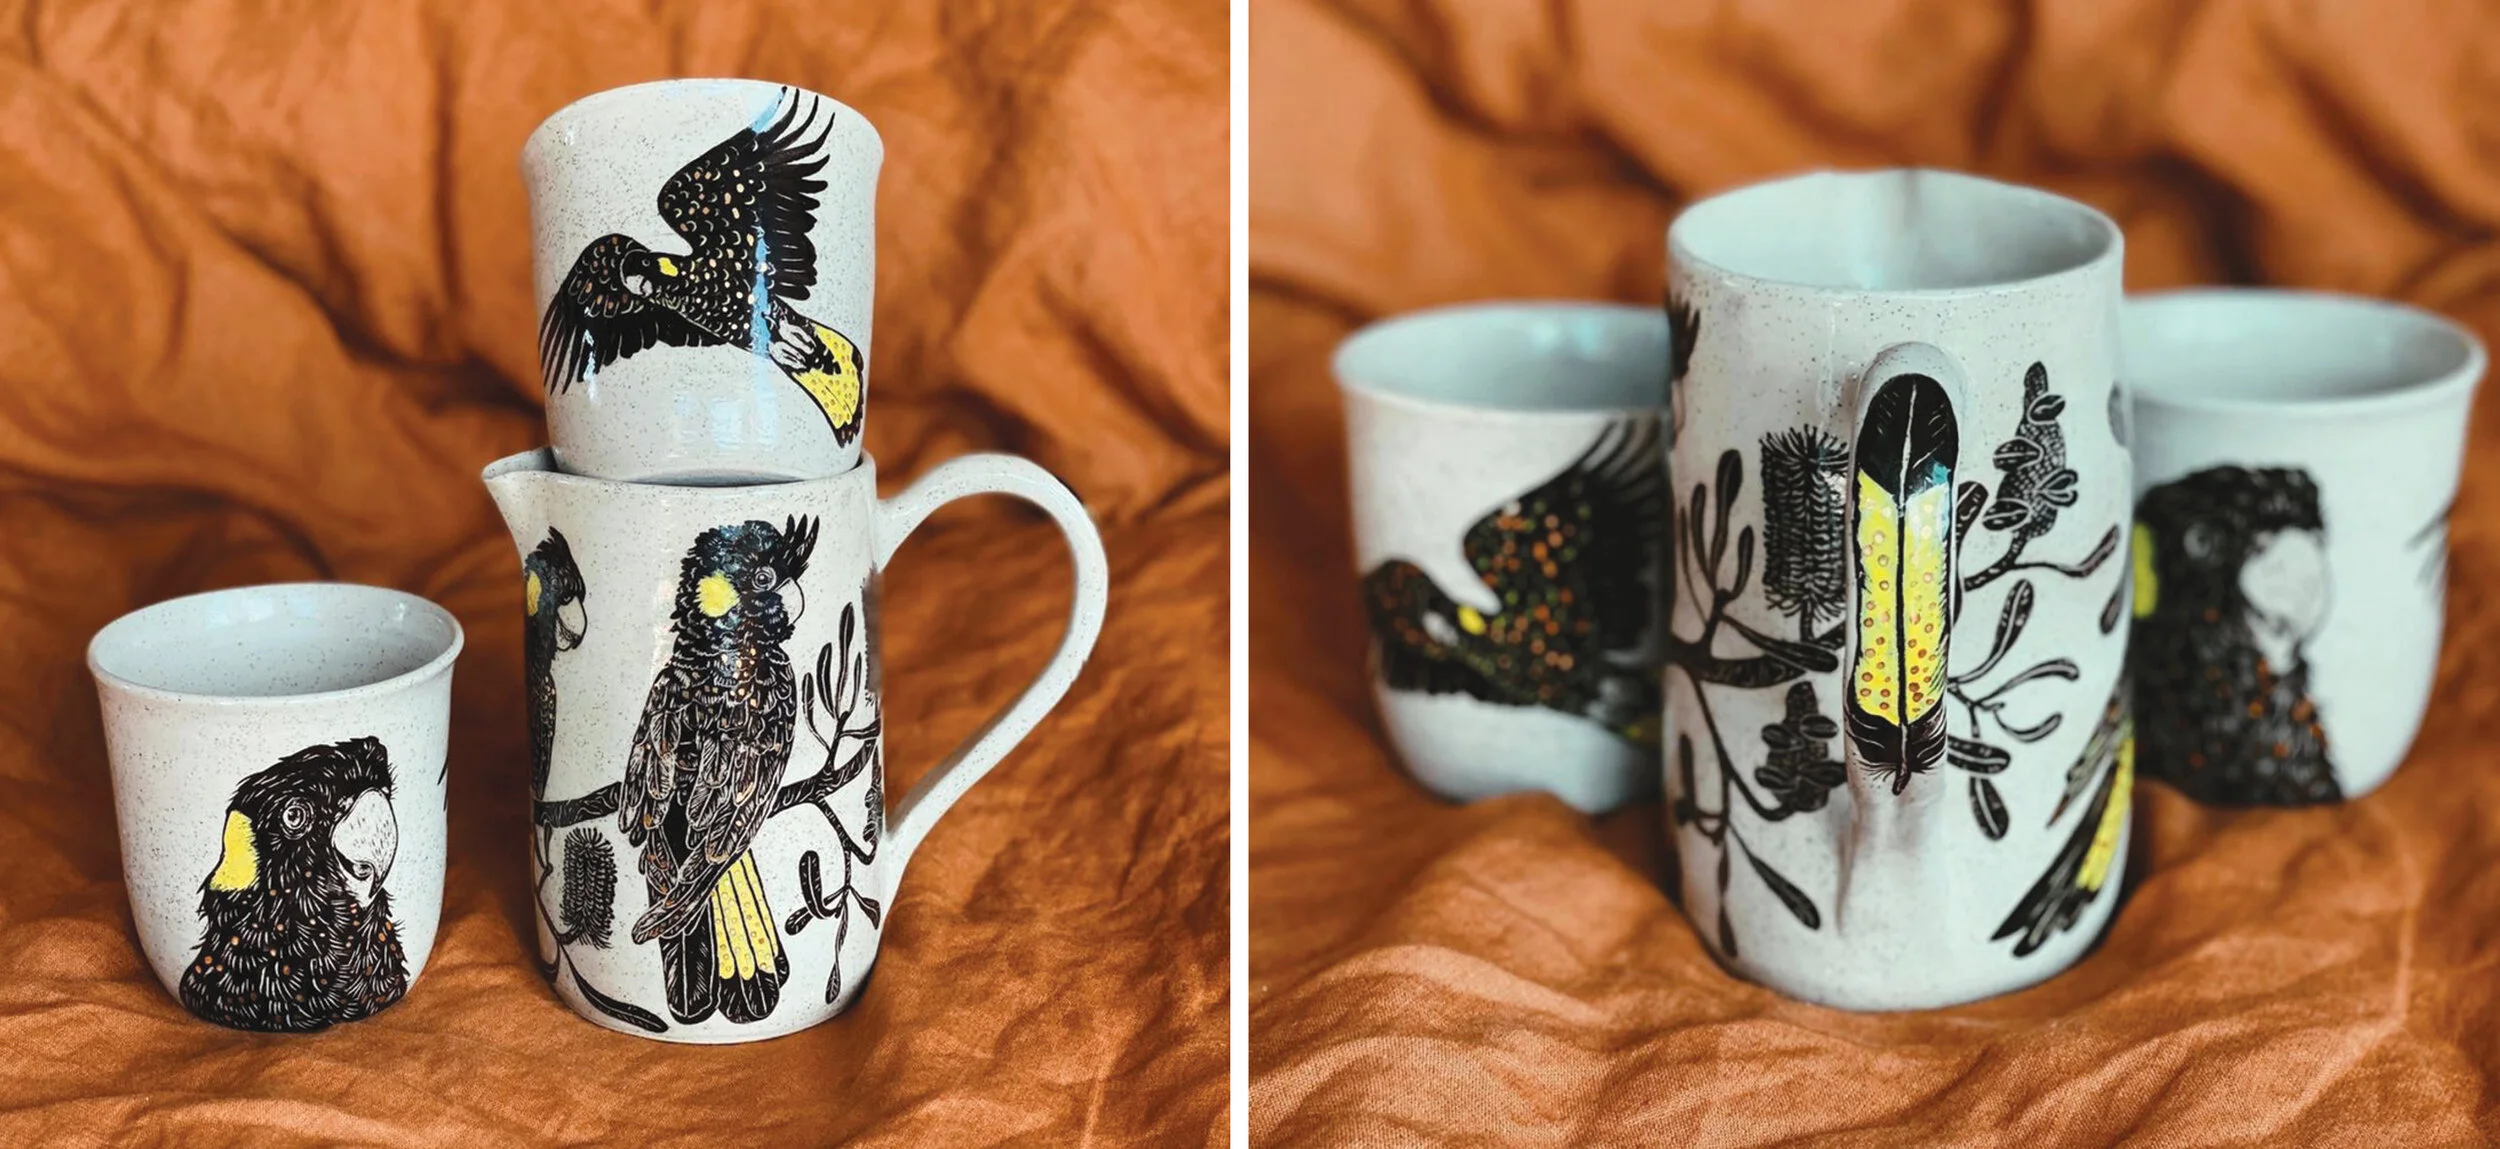
Art After Dusk Ceramics
Bessie Nunes is one damn talented lady. Her ceramic works are a labour of love and she prides herself on capturing the essence of her subjects. Her brand, Art After Dusk, was born out of the need to feed her creative soul: “…once I put the kids to bed I found myself staying up until the early hours of the morning to work on projects so I could feel like myself again. Being creative is the only way I know how to be, it brings me peace and balance but most importantly, it brings me so much joy.”
I’ve been a huge fan of Bessie since discovering her Instagram earlier this year and every time she releases a collection of illustrated ceramics they sell out within minutes! You can find her new pieces at the following upcoming exhibitions at WAC with Canberra’s Potters Society and subscribe to her newsletter (and set an alarm!) for her next ceramics drop.
Prices From: $50+
Art After Dusk Online Shop
Art After Dusk On Instagram

Apiary Made Skincare
My mother gifted me a bottle of Apiary Made’s moisturising lotion last Christmas and I’ve used it literally day and night almost every day this year and I’m only JUST running out now! These guys craft a really beautiful range of skincare along with other bee-related products such as beeswax wraps, candles and their own honey. The reason their skincare is so special is from the use of Jelly Bush Honey which is an organic alternative to the many chemicals and parabens used in skincare today. Jelly Bush Honey is nature’s answer to a chemical-free skincare ingredient that aids in anti-inflammatory and antibacterial properties.
What also makes this brand so special is their Honey Of Hope Project, which raises funds for Heifer International - an organisation helping families to overcome hunger, poverty, and to develop sustainable incomes. Heifer International works with communities by providing animals such as goats, chickens or honey bees as a source of food and a sustainable, and reliable income for people in need. These families then 'pass on the gift', giving the first female offspring of their animal to another family.
Who knew the gift of some delicious scented, super moisture-rich Jelly Bush Honey and Jojoba cream could give back so much?!
Price $46
Buy Jelly Bush Honey Hydrating Face Cream
Apiary Made on Instagram
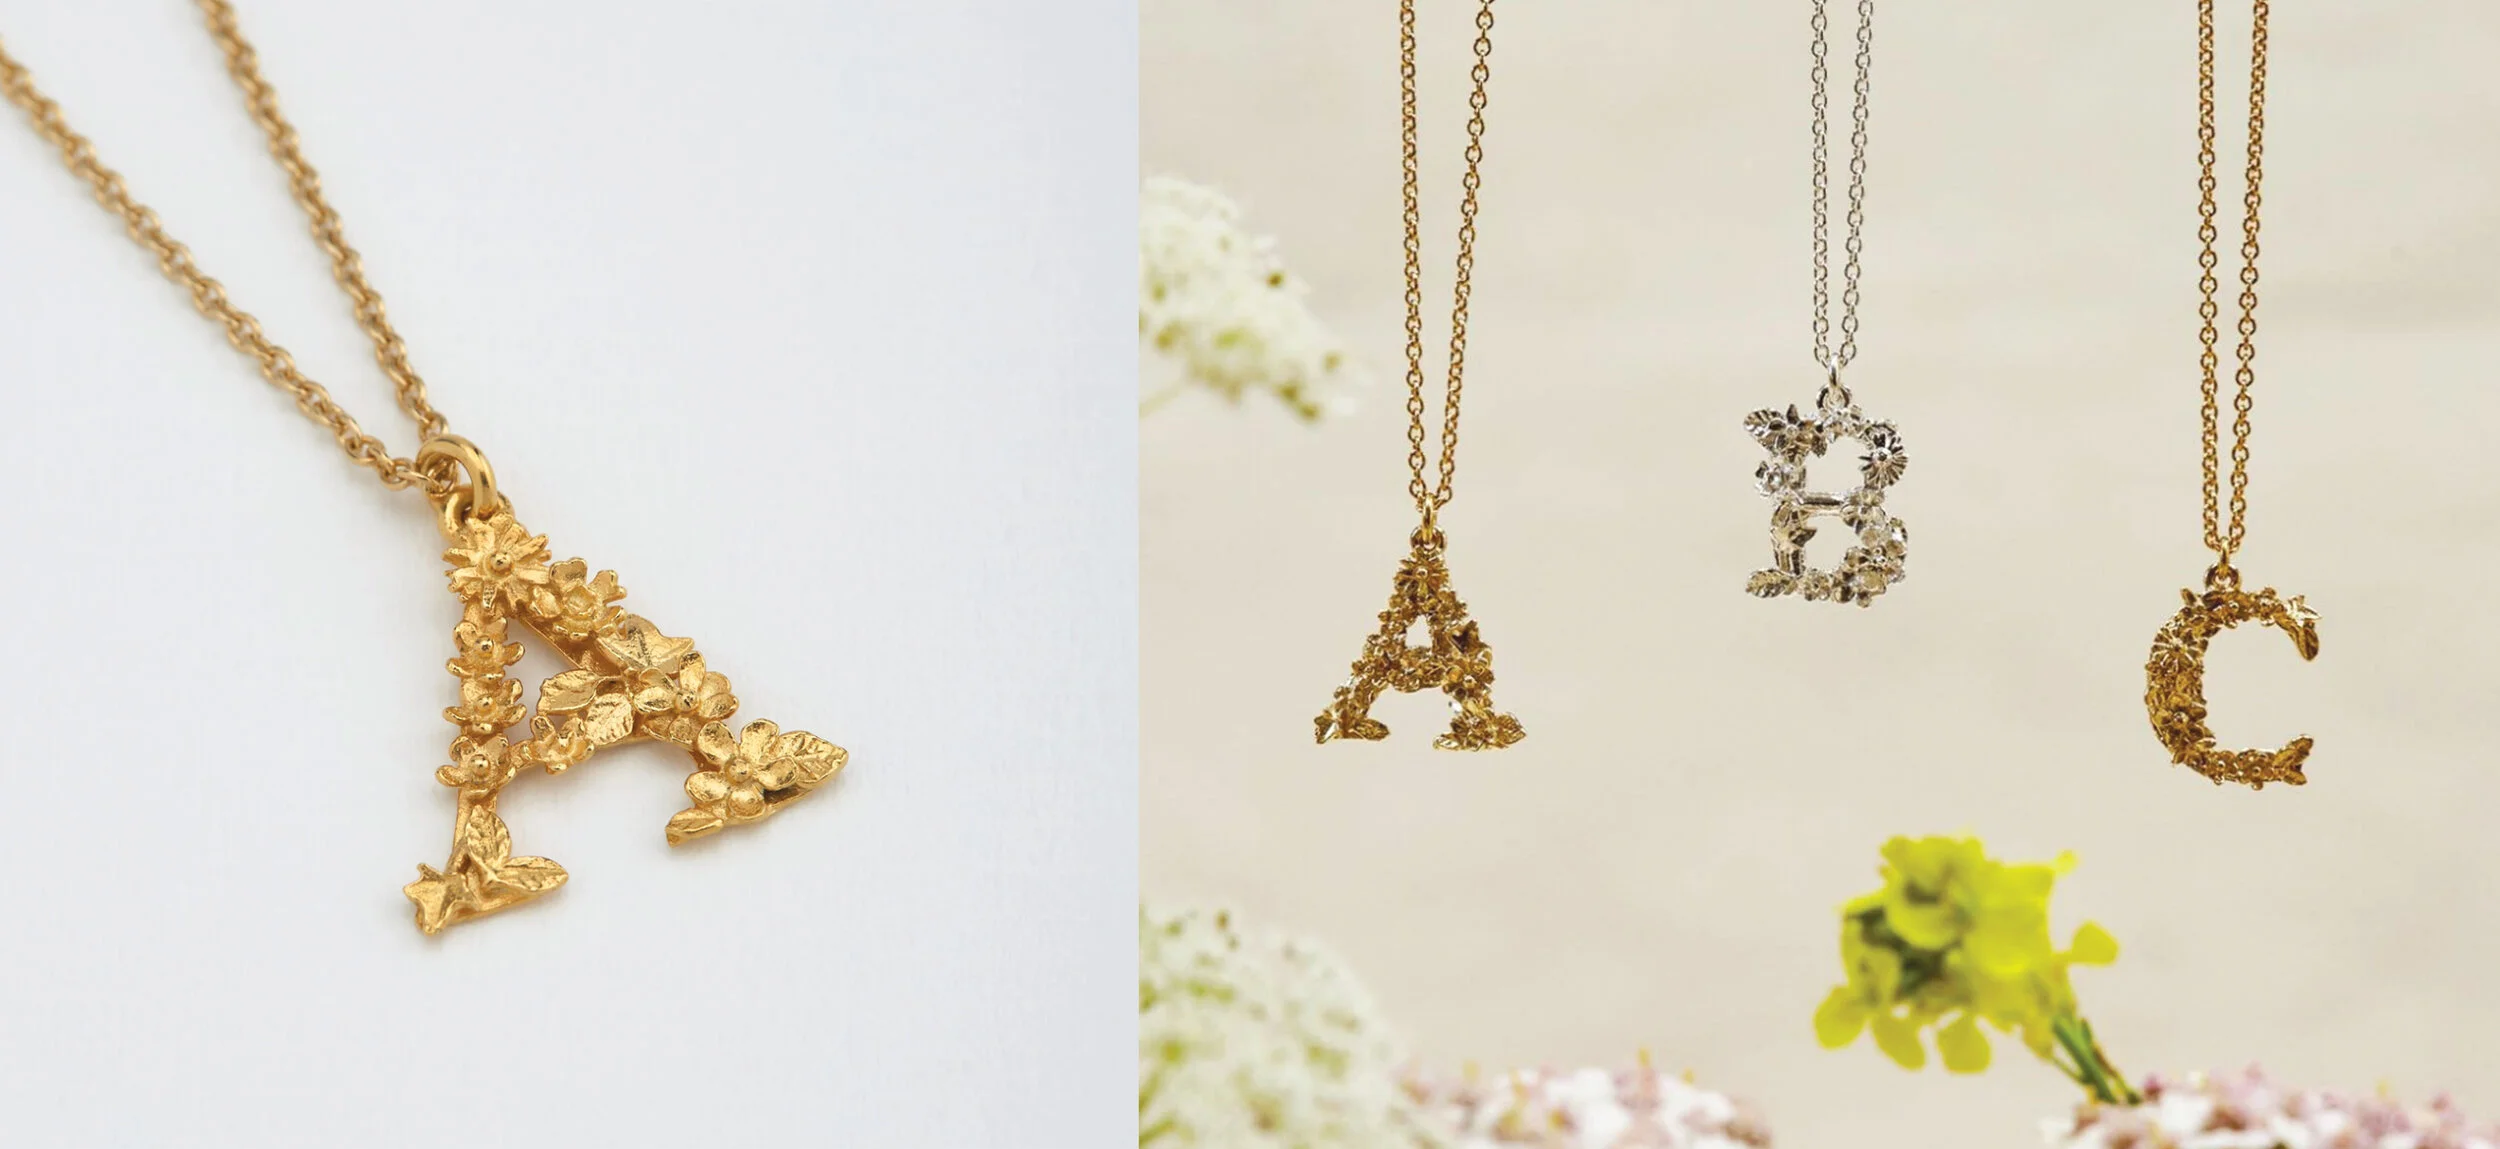
Alex Monroe Alphabet Necklaces
Okay, so this brand is not Australian, however, they are stocked in several boutiques around the country including the NGV and MCA gift shops and have been high up on my wishlist for a long time. I’ve always been a big fan of anything illustrative and Alex Monroe who’s work is feminine, delicate and quirky, but above all consistently wearable. Each and every piece is individually designed and handmade in England by Alex and his team of expert jewellers. I was especially pleased to see they now offer Botanical Illustrated Letters as jewellery in their Floral Alphabet range. I personally think these make the perfect gift to give along with one of my Botanical Alphabet prints!
Price: £105
Buy Floral Alphabet Necklaces
Alex Monroe Instagram
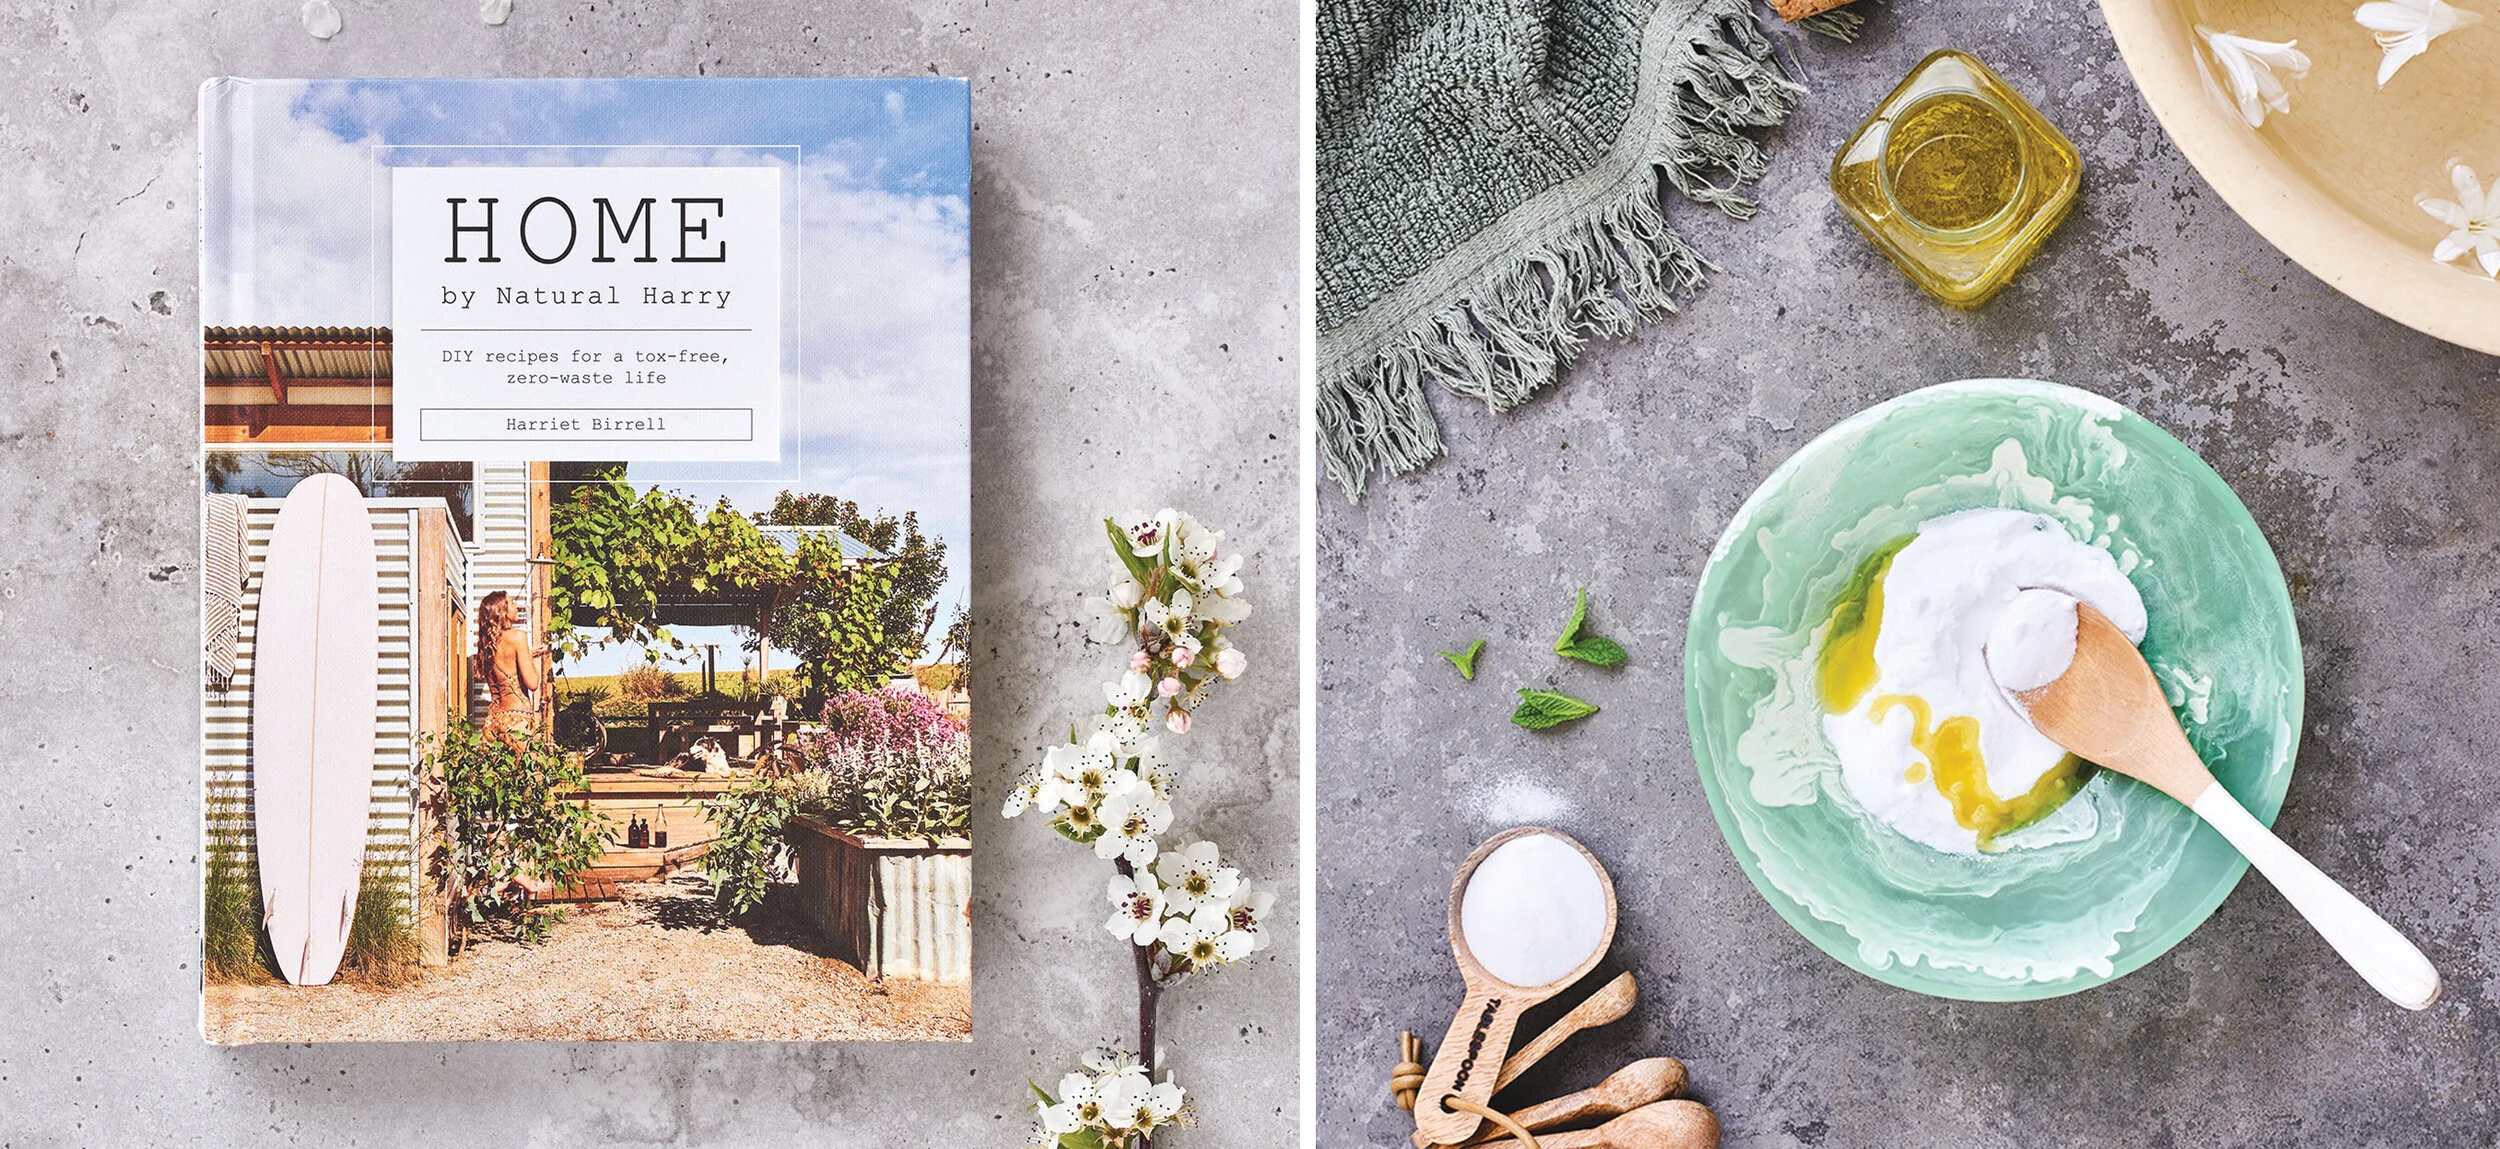
HOME Book By Natural Harry
I first discovered Harriet through a small architecture feature of her & her husband’s 40 square metre house that they built on the South Coast of Melbourne, then quickly followed her after reading some of her plant-based recipes and realising she too was a self-described 'rooky surfer and clumsy goofball’. Born out of her first project which was a wooden caravan that sold smoothies and raw desserts, her main focus in the past has been publishing healthy recipe books that focus on plant-based cooking until her newest book release, titled HOME.
HOME is a book that encourages you to tread a little lighter on the earth through toxic/waste/plastic-free remedies and recipes for cleaning and personal products you’d use in your own home that is not only effective but actually really simple to make. Again, I grabbed a copy when they were released at the end of October and I’ve been kicking myself for not trying some of her home-made cleaning supplies and hair products sooner! An added to bonus to this book is you could keep it for yourself and use a bunch of her remedy & recipes to create home-made gifts for your friends family instead! Win!
Price: $34.95
Buy Home By Natural Harry
Natural Harry Instagram

Jess Hutchison 2021 Calendar
Jess Hutchison hails from the South Coast of NSW and has been a huge source of inspiration and help regarding finding a good printer for me since I found her work online earlier last year. She’s a talented painter who creates beautifully detailed paintings of Australian birds and native flowers with a contemporary colour palette and has pulled her best sellers all together into her 2021 Colours Of Australia Calendar!
If you want to go a step beyond the annual calendar you can also shop a huge variety of prints and originals through Jess’ website where she even has a ‘Try in your room’ plugin which allows you to submit a photo of the space you’d like to put the artwork and see how it’d look! What a talented lil lady.
Calendar price: $45.00
Buy 2021 Colours Of Australia Calendar
Jess Hutchison Instagram
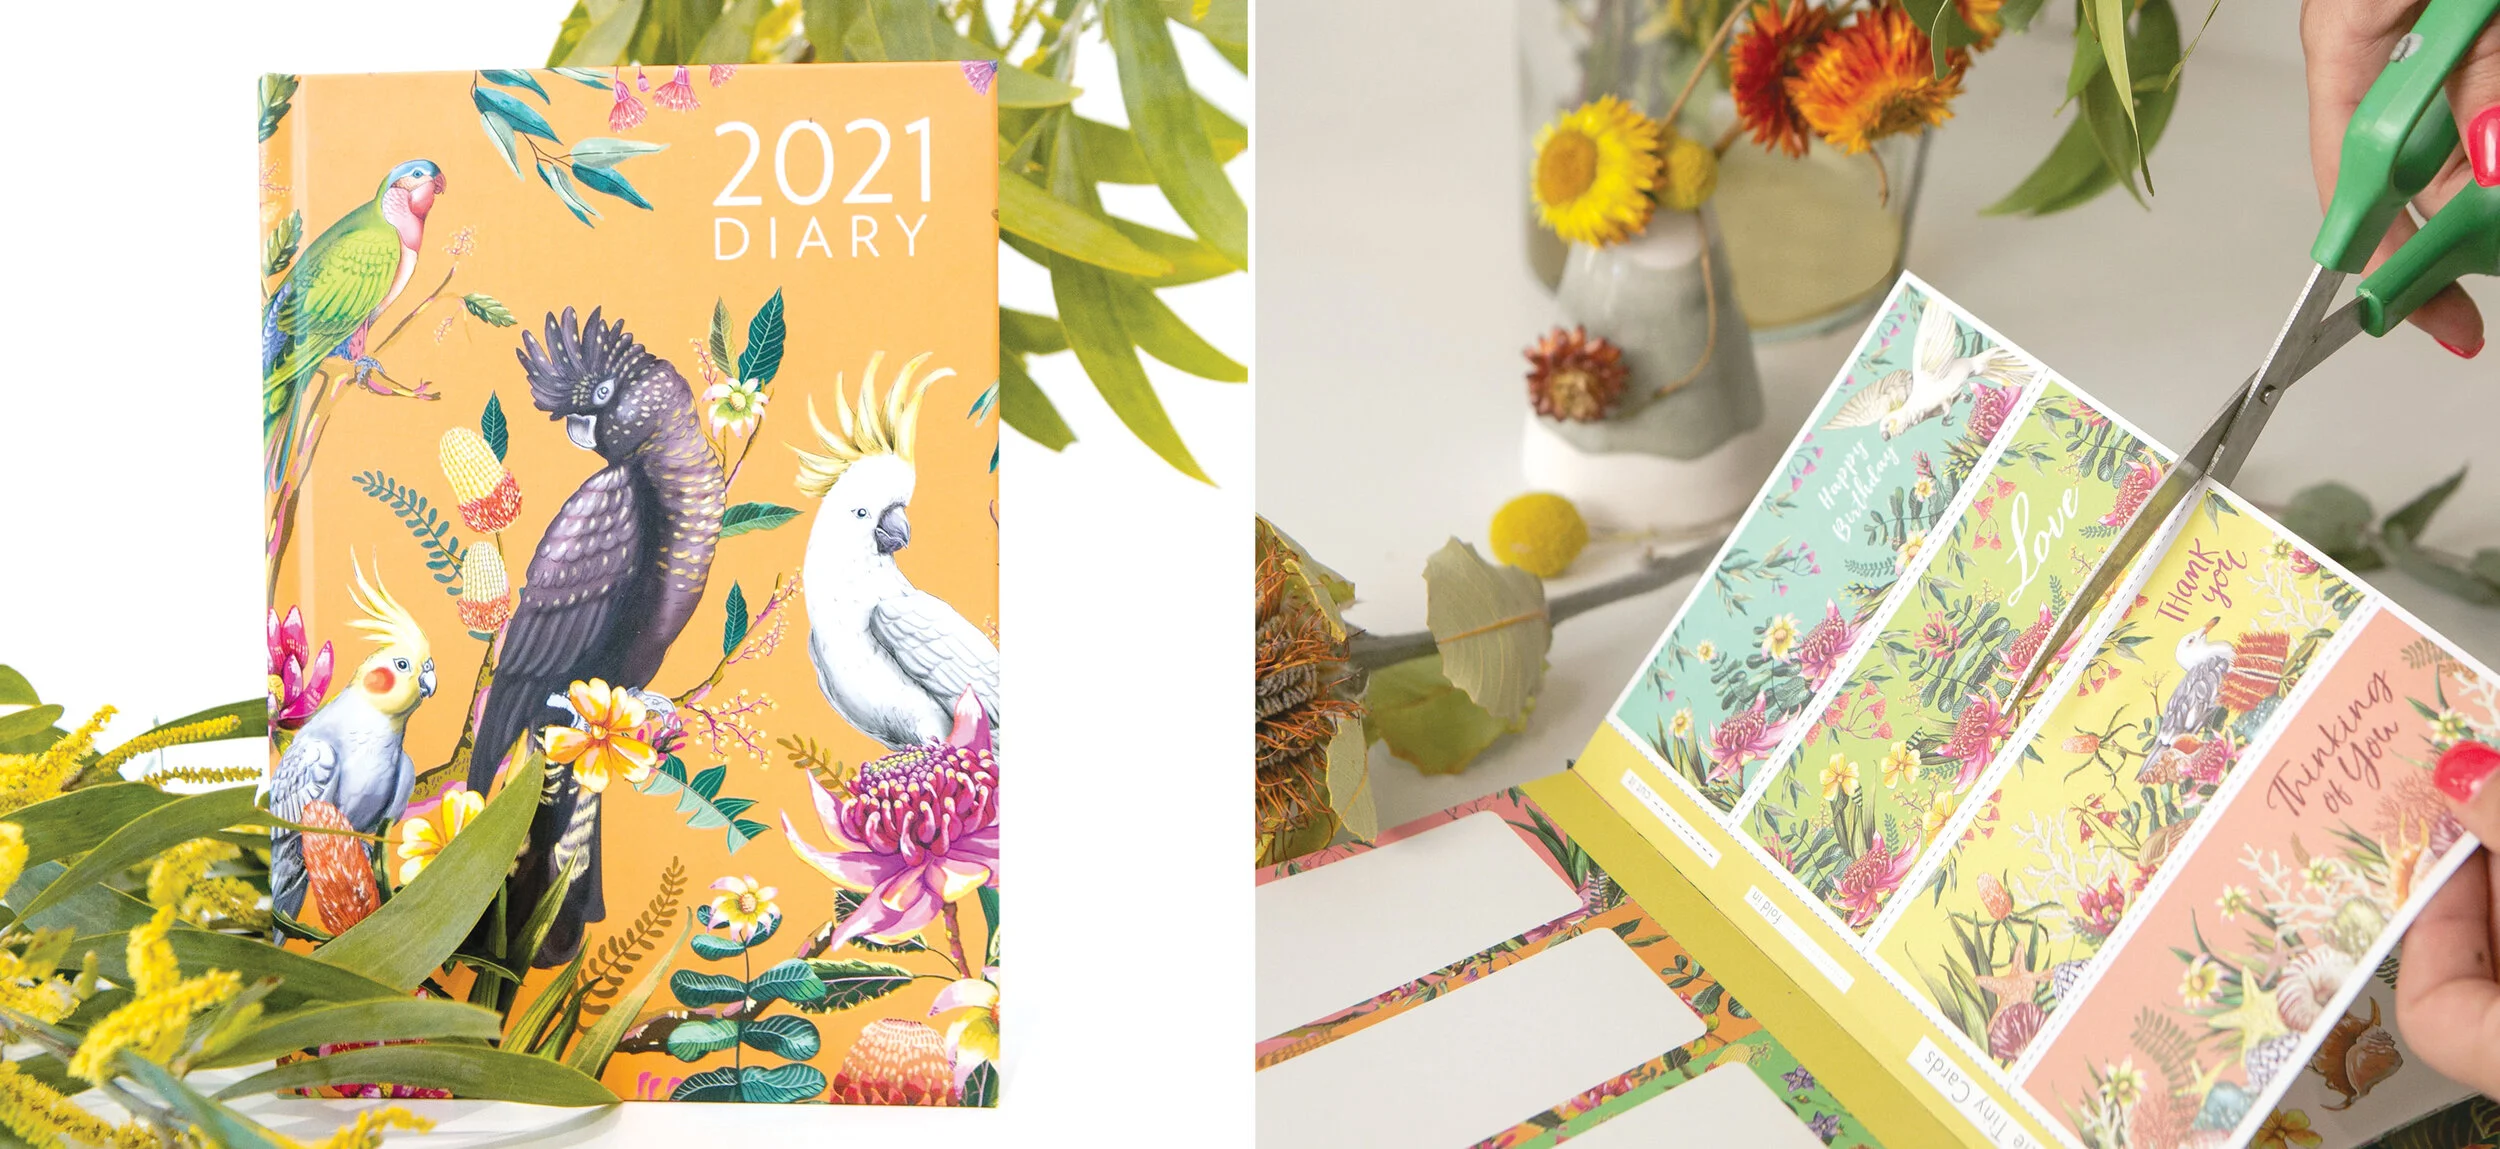
La La Land 2021 Diary
It wouldn’t be a gift guide without including a 2021 planner and diary by who other than my favourite gifting brand (and my employer!), La La Land. Yes, I’m biased as I’m their in-house designer & art director but the latest diary we designed is packed full with Australian birds and contemporary colour features illustrations by myself and fellow artist, Murilo Manzini. The Floral Paradiso Diary follows a week-to-week layout with monthly summary pages, contacts, tiny little mini cards you can cut-out, positive affirmation pages for self-development & good vibes, and LOTS of room for notes and STICKERS!
Basically, this diary is designed to help take the chaos out of next year and to celebrate being done with 2020!
Price: $29.95
Buy La La Land 2021 Diary
La La Land Instagram

Nature To Grain Platters
Nature To Grain is a passion project created by a crafty couple from the Mornington Peninsula that combines woodwork with epoxy resin pouring to set stunning sustainably and ethically sourced dried native compositions between the grains of their chosen wood. Everything they create is so awe-inspiring from their colour palettes to the eclectic textures making every creation a true piece of art. I’m obsessed with their Instagram page and am constantly watching their stories as they record the production process!
They offer platters, tabletops, wall art, and custom pieces through their website but have warned that their current wait time for custom orders is 3 months and are booking up QUICKLY for Christmas orders, so get your orders in quickly!
Prices From: $200+
Nature To Grain Website
Nature To Grain Instagram

Moonshine Madness Tea Towels
Mel is one of those Instagram accounts I was drawn to for her awesome retro-inspired illustrations and colour palettes that seem to be inspired by her country lifestyle and has led to some seriously cool artworks. You might also recognise her work in your local bottleshop plastered across vibrant beer cans for Lost Palms & Newstead Brewing Co. Mel is based in rural Queensland and creates small runs of her art on T-shirts, Art Prints and Tea Towels.
Her tea towels are printed in Sydney on a cotton/linen blend, and then hand-stitched and lovingly assembled by Mel and her Mum.
Price: $30
Buy Moonshine Madness Tea Towels
Moonshine Madness on Instagram

Wholesome Store Embellished Spoons
Brisbane based Wellness blogger, Ellie runs her own ethical, eco-conscious & plant-based concept shop, The Wholesome Store. Her 100% vegan and ethical curated products sell out all the time including her personally designed spoon and cutlery range which is crafted from solid cast brass and feature embellished wooden like handles with delicate brass bees!
I love all things bees and I quickly jumped on her last release back in September to secure a couple for myself. Again, they sell out really fast so I recommend subscribing to their newsletter and keeping an eye on their socials to catch the next drop of designs!
Price: $17
Buy Wholesome Store Embellished Bee Spoon
Wholesome Store on Instagram

South Coast Distillery Gin
I was on my way to a Birthday lunch and had to pick up a bottle on the way, so I stopped in at Thirroul Cellars where I was introduced to local NSW South Coast Distillery’s Gin! I purchased their limited edition Oolong infused gin and it was SO GOOD! Everyone at who attended that Birthday lunch still talks about the uniquely refreshing taste still to this day and unfortunately, I haven’t yet found another bottle.
I was happy to find that they do have other kinds and was also really impressed by their multi-award winning Batch Zero Gin recipe bottled into their ‘Sublime Gin’, aptly named after Illawarra’s favourite Sublime Point landmark. It has strong but smooth flavours of lemon myrtle, cardamom, and dandelion root, best enjoyed straight, on the rocks, or in a G&T paired with fresh lime or grapefruit peel.
South Coast Distillery Gin was created by a bunch of gin-enthusiast housemates out of Wollongong and prides themselves on having a focus on responsibility and sustainability, and supports its local farmers by sourcing ingredients from Illawarra-based producers whenever possible.
You can buy directly through their online shop or if you’re in the area pop by their cellar door and try what’s brewing every Friday night!
Price: $80
Buy South Coast Distillery Sublime Gin
South Coast Distillery on Instagram

HOW I ILLUSTRATED THE TREE OF LIFE RANGE FOR LA LA LAND
Inspired by the Romanticism era of intricate tapestries and the iconic work of William Morris, learn how I illustrated Australian native birds with a vintage twist.

Inspired by the Romanticism era of intricate tapestries and the iconic work of William Morris, I illustrated Australian native birds with a vintage twist.
Research:
The range was thought up by La La Land creative director, Elie Azzi after many inspiring visits to art galleries, in particular, the unicorn tapestry exhibition that toured the Art Gallery of NSW back in 2019. The aim was to create an equally dreamy artwork with an Australian influence that we could apply onto mugs, melamine sets, and giftware to launch as a fully stocked new range at our bi-annual tradeshow.
Through my own research, I reviewed the styles, colours and techniques William Morris employed on his iconic tapestry and print designs paying special attention to his stylised use of flora and how he seamlessly created beautiful patterns that seemed both organic and organised all at once.
I also discovered an incredibly useful resource via Flickr account of Biodiversity Heritage. This incredibly in-depth catalogue of biodiversity literature which was created for ‘serendipitous discovery’ was a fantastic resource where I spent many hours scrolling through some of the 2 million published images.

I located some 120 year old illustrations of native Australian birds which worked as an excellent reference point for both style (as I wanted to reference the relevant era of illustration) and form so I could base my illustrations off the original era’s proportions of the birds.
Using this approach I also located some excellent Australian plant references along with less Australian, but more ornamental florals to illustrate too.
How I illustrated the birds:
Each element within my design is illustrated using these following steps.
Using my Cintiq Wacom Tablet and Adobe Photoshop, I carefully illustrate a ‘pencil’ like drawing of the subject, in this example it’s a bird.

Then, on layers beneath my ‘pencil sketch’ layer, I use the pen-tool to add solid colours and the dodge (lighten) and burn (darken) tool to create highlights and shadows in the solid colour, allowing for more clarity and dimension.
I then save this file with no background layer and use it in my final composition when arranging all my elements together! I like to work this way so that I can easily condense my ‘working layers’ into one focused element e.g. this Crimson Rosella whilst allowing myself the flexible option to return to the original bird file to edit it should I need to.
With all my elements such as flowers, leaves, birds etc. illustrated like the example I gave above, I work to the dimensions of each product the illustrations will end up on such as a mug, and create a unique layout that showcases all the elements harmoniously (duplicating elements where I need to in order to help create patterns too!)
Hopefully the above information is interesting to some or useful to others! I employ many different illustration styles and techniques when creating custom work for La La Land depending on what the brief may be, but this style of illustration is definitely one of my favourites and if you’ve got the tools to create it I definitely recommend you give it a try!


Shop The Range
You can shop the entire Tree Of Life range for La La Land shop HERE!
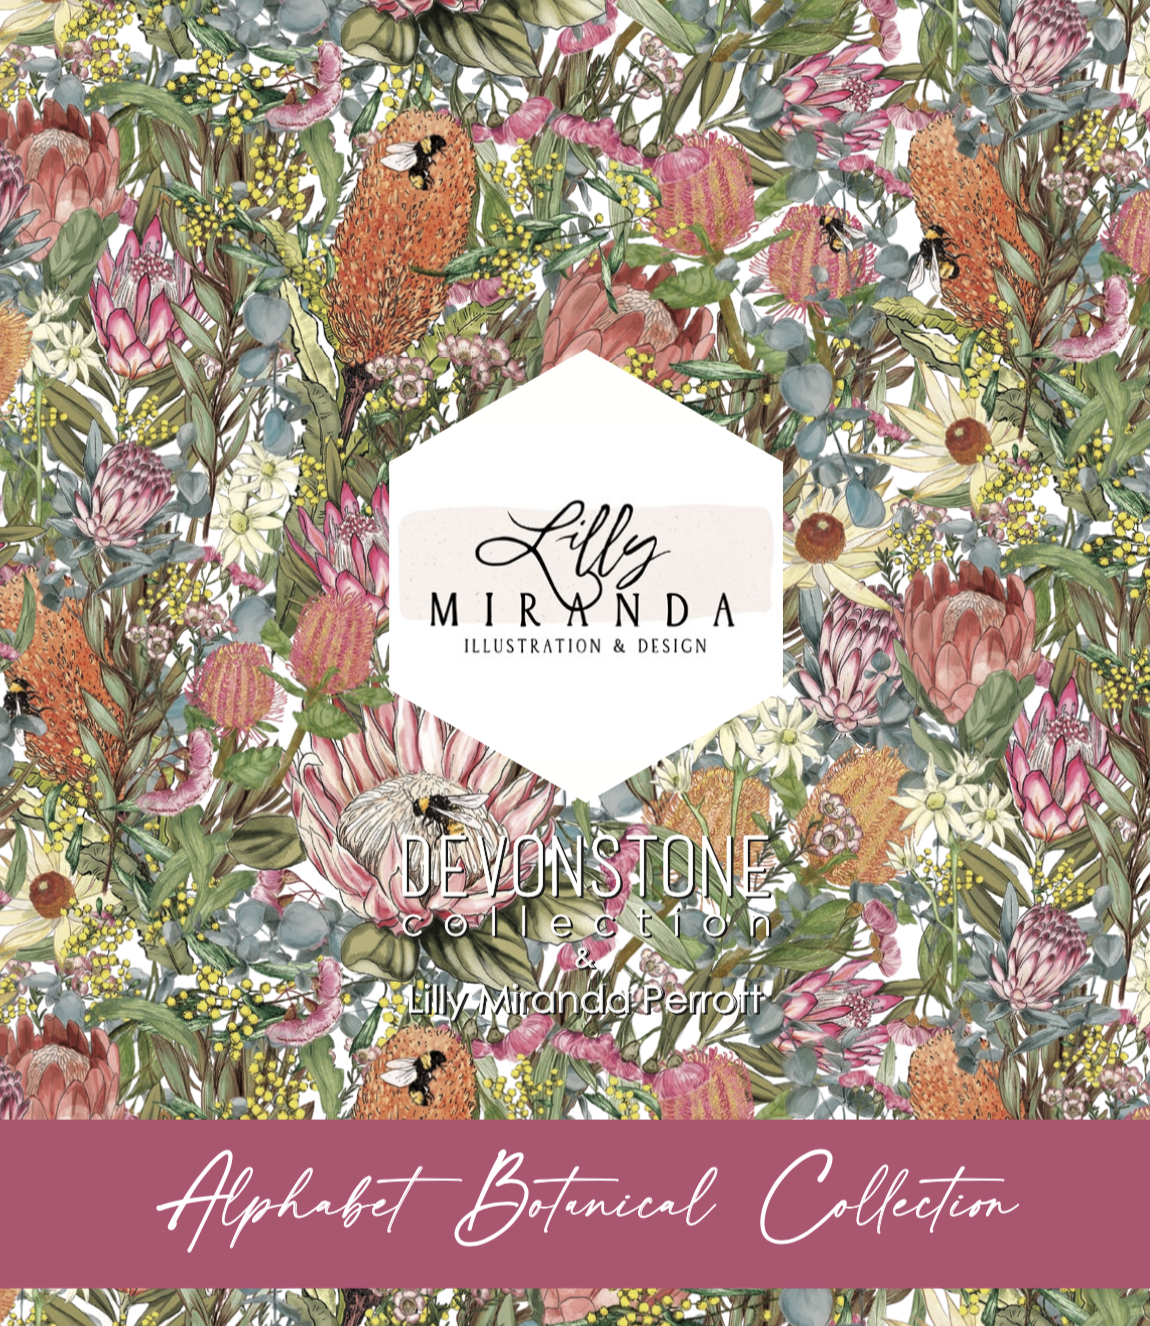
ALPHABET BOTANICAL COLLECTION | The Importance Of Passion Projects
How I managed to turn a passion project into a product!

I’ve always loved textile designs, which is something I probably picked up from my mother, who’s always collected beautiful fabrics wherever she travelled and encouraged me to do the same.
I’ve got my own little collection I’ve been building over the years, some keepsake prints I picked up in India along with raw silks and beautifully toned linens, and other more unique designs I’ve been gifted from my mother or nanna in hopes of one day upholstering some cushions or transforming into an item of clothing.
I was fortunate enough to be asked by eco-friendly Melbourne based swim designer, Baaby Swim back in 2018 to design my first published print featuring Australian waratahs, poppies and roses for their first-ever printed swimwear pattern which was SO much fun! Experimenting with the repeat pattern and alternate colourways was eye-opening and a great taster for me into understanding more about how the textile industry works.

Baaby Swim Bikini Design - Available through baaby.com.au
It was thanks to digging through my old college work from Enmore Design Centre (TAFE) that I found an old project where we had been asked to recreate the alphabet with our own fonts. (Believe it or not I had used chicken skin & pegs to piece together all the letters and photographed them all - it was very fleshy and super gross but I still reckon it was a good concept!)
This inspired me to try out the project again but using my library of illustrated florals I’ve been growing for the past 5 years through many different jobs and projects. I chose a nice serif font to use as a template and set to work on illustrating some additional flowers to help create better structure to build up the letterforms and after about 3 weeks of putting them all together, I had created my very own illustrated botanical alphabet!


Alphabet Botanical Prints available HERE
I ended up launching the full alphabet as an art print series and sent out a newsletter to everyone who had subscribed to my website, and all the clients and people I had worked with in the past sharing my new range.
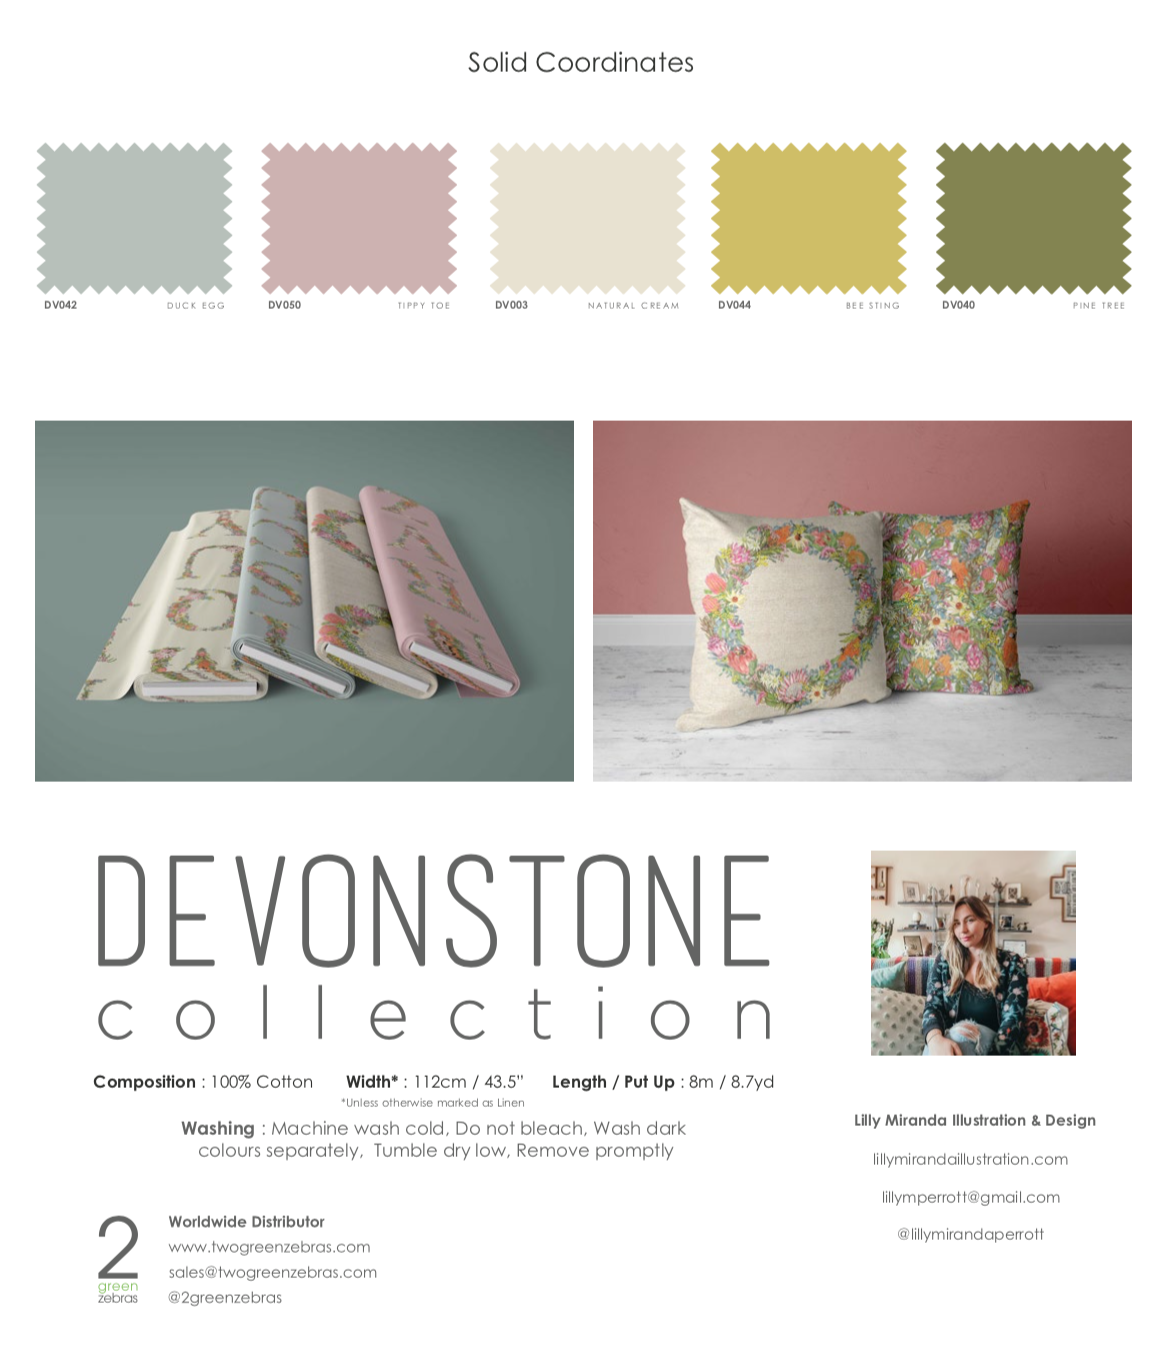
Thankfully 2 Green Zebras saw this and contacted me with a VERY exciting proposal! An 8 piece textile range appropriately titled Alphabet Botanical Illustration Collection (ABC Collection) featuring 5 beautiful colourways, my full alphabet print, an all-over fabric pattern and a wreath printed on linen for embroidery.
After only a couple of weeks of compiling the files, signing off on layout and colour it was up online and that was it! My very first textile range!


Alphabet Botanical Collection - Textile range available via twogreenzebras.com
I am so grateful for taking the time out from work to create a passion project for no one else but myself. Sometimes when you make time for yourself it can help you achieve so much more than you can imagine!
I think it’s easy to get caught up in the demand of designing and illustrating for others and so important to take the time to just work on something just for yourself. You never know where that little project can take you!
THAT TIME MY ILLUSTRATIONS BROKE THE INTERNET...TWICE
The wild ride of how my simple, yet taboo Valentine’s Day card caused a crazy news media syndicate followed by a sold-out range!

It’s not every day my artwork ends up plastered on the newsfeeds of hundreds of thousands of Australians, but when it does, the entire product line sells out! This was one of the most exciting and monumental experiences in my career so far.
“But how did it happen?” I hear you ask.
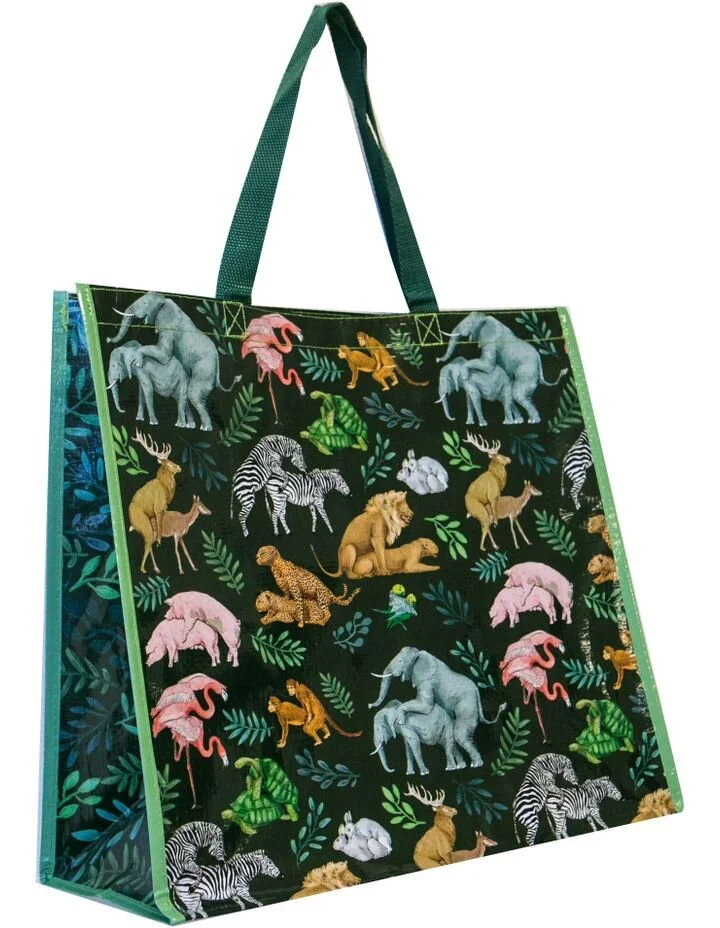
Well, as with every great idea, it all started as a bit of fun; a brainstorming project between La La Land Founder and Creative Director, Elie Azzi, and I. What started as a concept of two rabbits humping for a Valentine’s Day card, soon evolved into the a idea of illustrating a variety of colourful animals with tropical, jungle-style leaves to accompany the romantic greeting, ‘I’m Wild Fur You’.
Deciding to carry the design across not only a card collection, but our tea towels and market bags as a playful gift for those Valentine's Day customers with a little quirk, the ‘Wild Fur You’ collection was quickly put to production and brought to life.
Premiered to our wholesaler buyers, Australian department store, Myer, was amongst the first to pick up the collection. The brand has been slowly growing our range throughout each season, and it is always exciting to know my work will be displayed to so many Myer customers. We also loved that the brand was onboard to stock such a tongue-in-cheek design!
Fast-forward a few months, and the collection finally hit shelves across distributors, nationally. One perplexed Mum snapped a photo of our ‘Wild Fur You’ bags in Myer whilst out shopping, sharing it on a Facebook mother’s group. The post received an avalanche of feedback and reactions which were, for the most, positive and receptive to our classic Aussie humour.

Before we knew it, the ‘Wild Fur You’ collection was fast-circulating social media channels, with stories published across online news platforms, including Daily Mail, WSFM and POP Sugar. Unbeknown to us at the time. Myer had not only raised eyebrows as a result of its decision to stock such a risqué product, but had positioned it for sale in-store RIGHT next to the kids department (haha).


The poor buyer from Myer, apparently, received an alarming phone call in the middle of the night from one of the store’s board members, questioning why the hell they were selling a bag with animals fornicating on it?!! I mean, I guess with zero explanation it does sound pretty wild…
But, before they could take action and remove the products from the brands shelves, something amazing happened! The retail shoppers of Myer, literally, did the work for them. Almost over night, following the publication of the online news stories, our ‘Wild Fur You’ collection sold out across Myer, nationally, and from La La Land’s online store in its entirety, too.
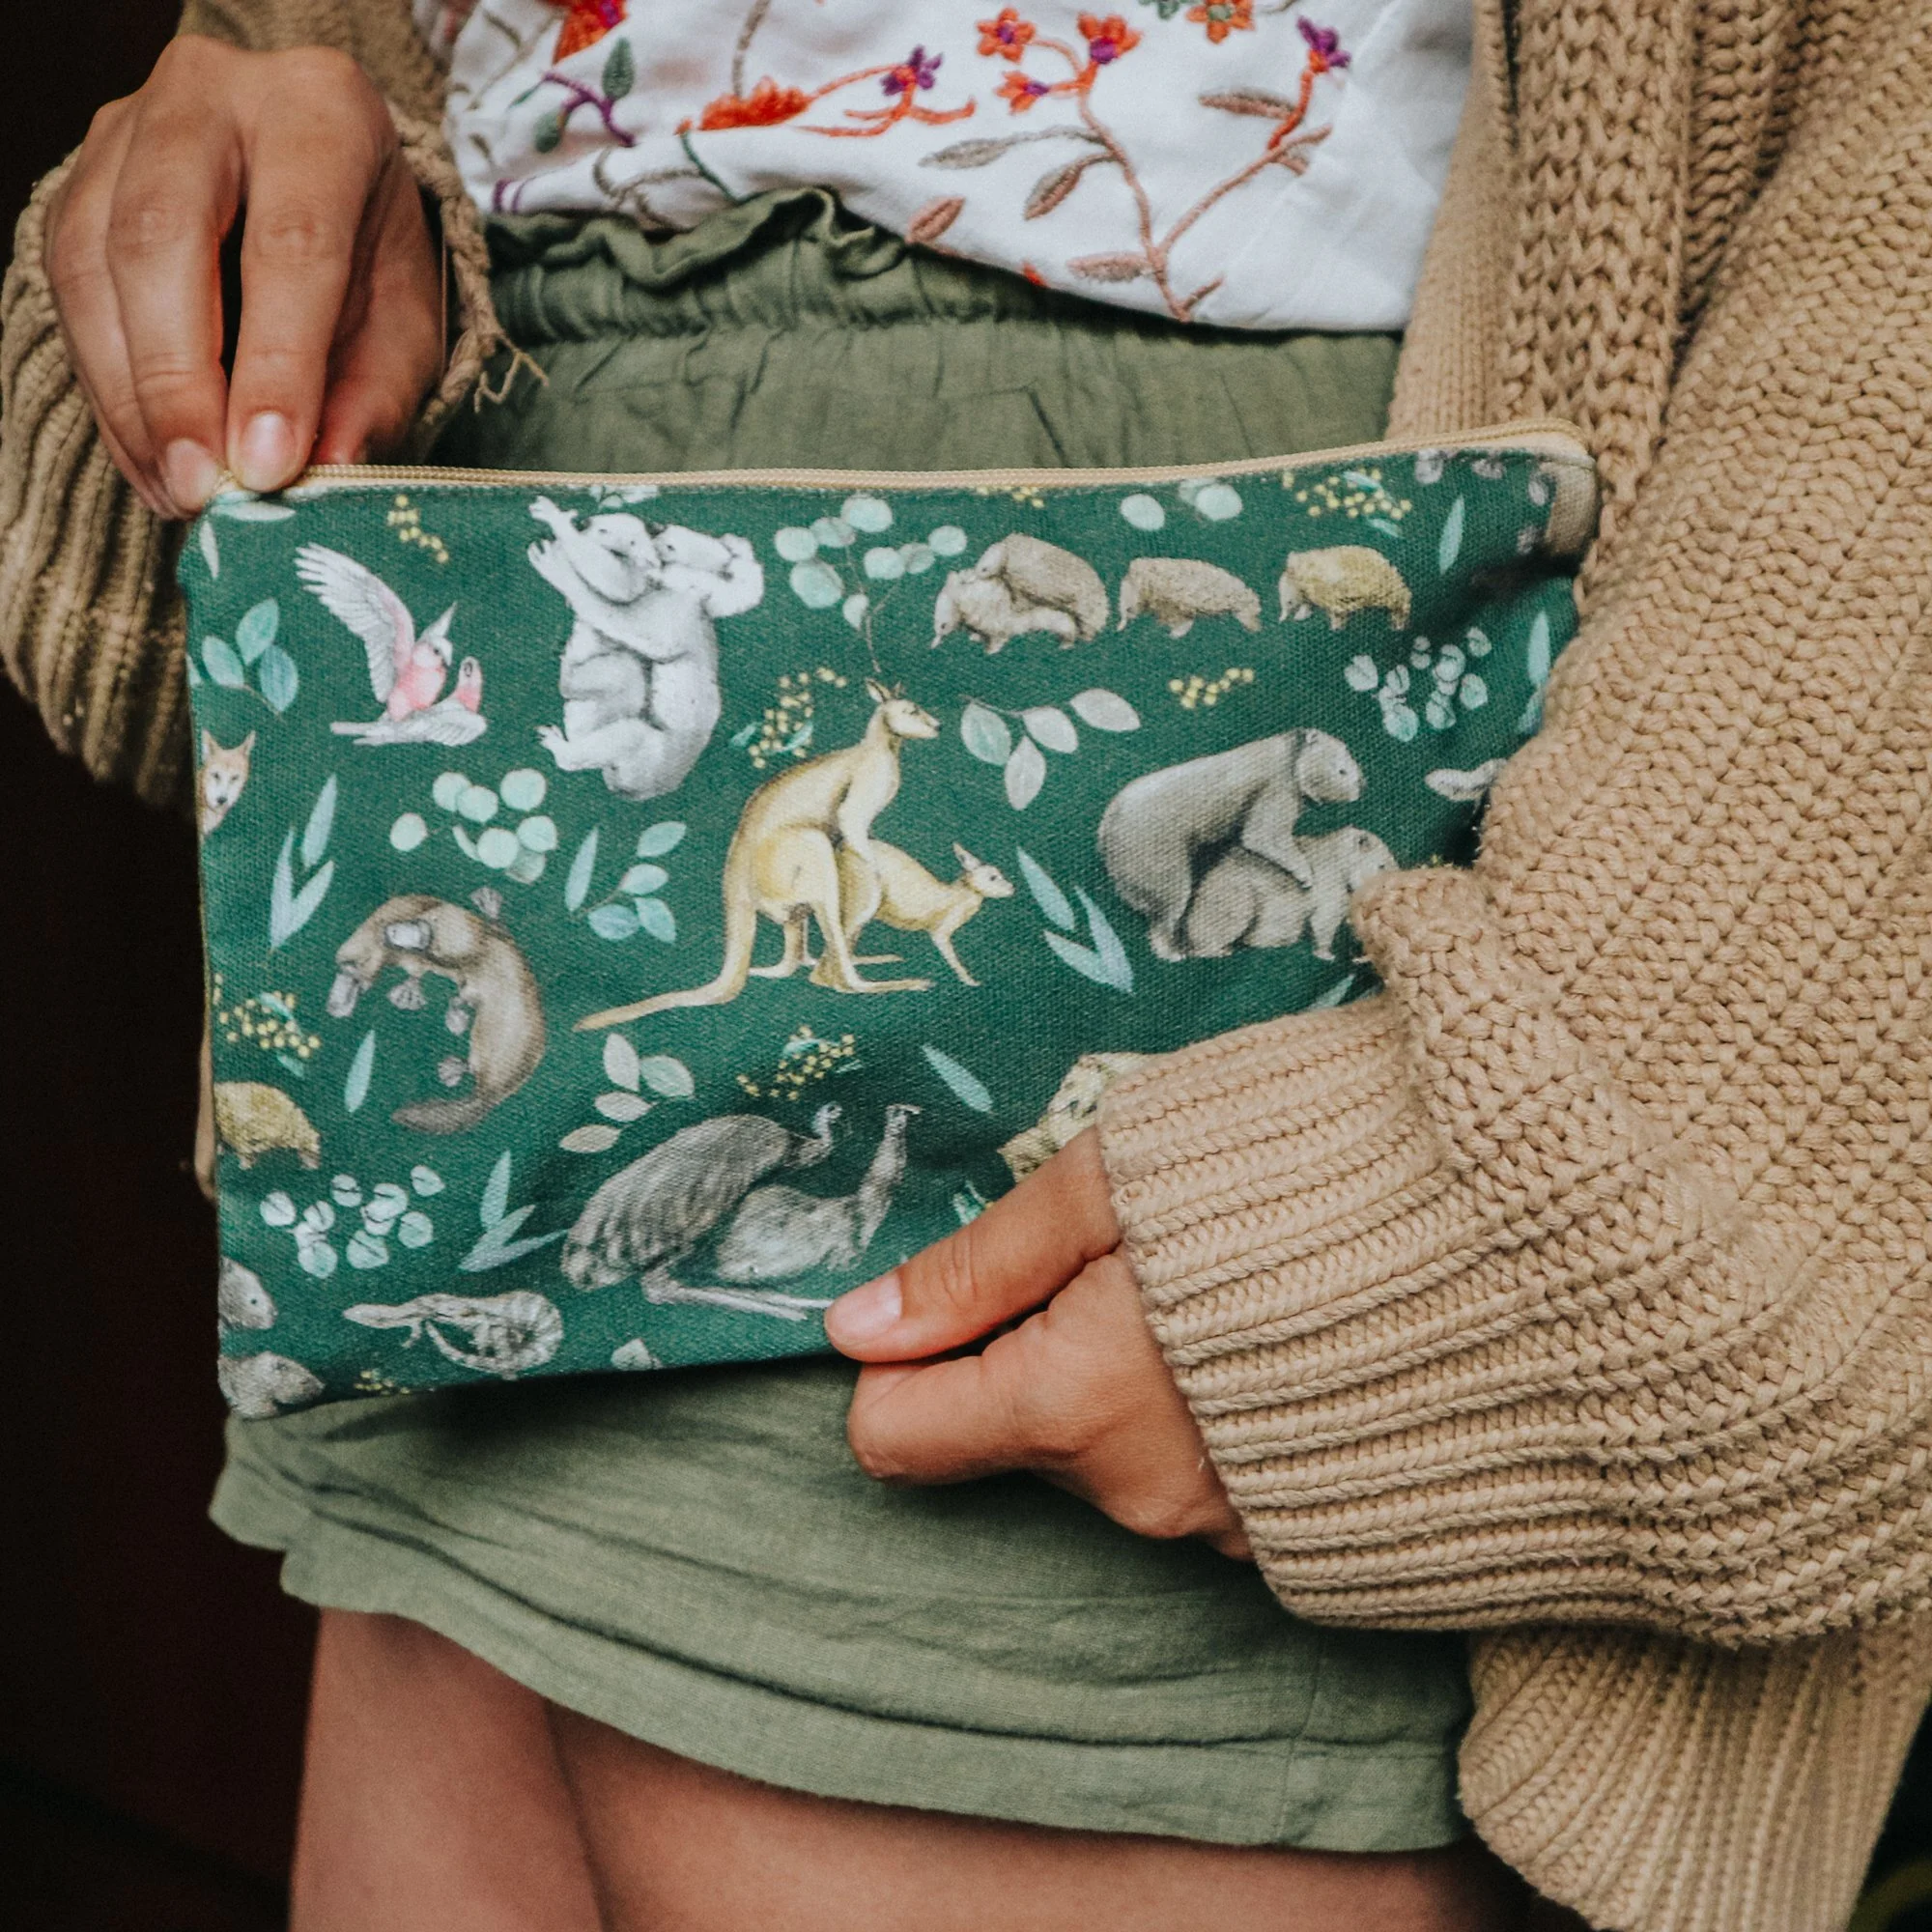
This lead to Myer requesting additional products be added to the ‘Wild Fur You’ collection (a swift 360 from the move to get the panic to remove the range from shelves)! SO, Elie and I put our heads together and thought, what’s better than animals having sex in a tropical, jungle pattern? AUSTRALIAN animals having sex amidst a native eucalyptus pattern!
I should probably point out at this point that a LOT of research went into this line. No, seriously. I never thought my career would actively require me to, let alone pay me to spend time Googling NSFW (not safe for work) images. But, alas, here we were, and I certainly learnt plenty about animal reproduction in doing so, all to ensure accuracy across my illustrations.

About a year later, we successfully launched our ‘Wild Fur You Australiana’ range across mugs, tote bags, clutches, purses, tea towels and keep cups, and Myer had signed on to exclusively re-stock shelves with our playful collection.
After roughly two months of being back on their shelves, I got a message from an old high school friend, tagging me in an article Pedestrian TV had posted.
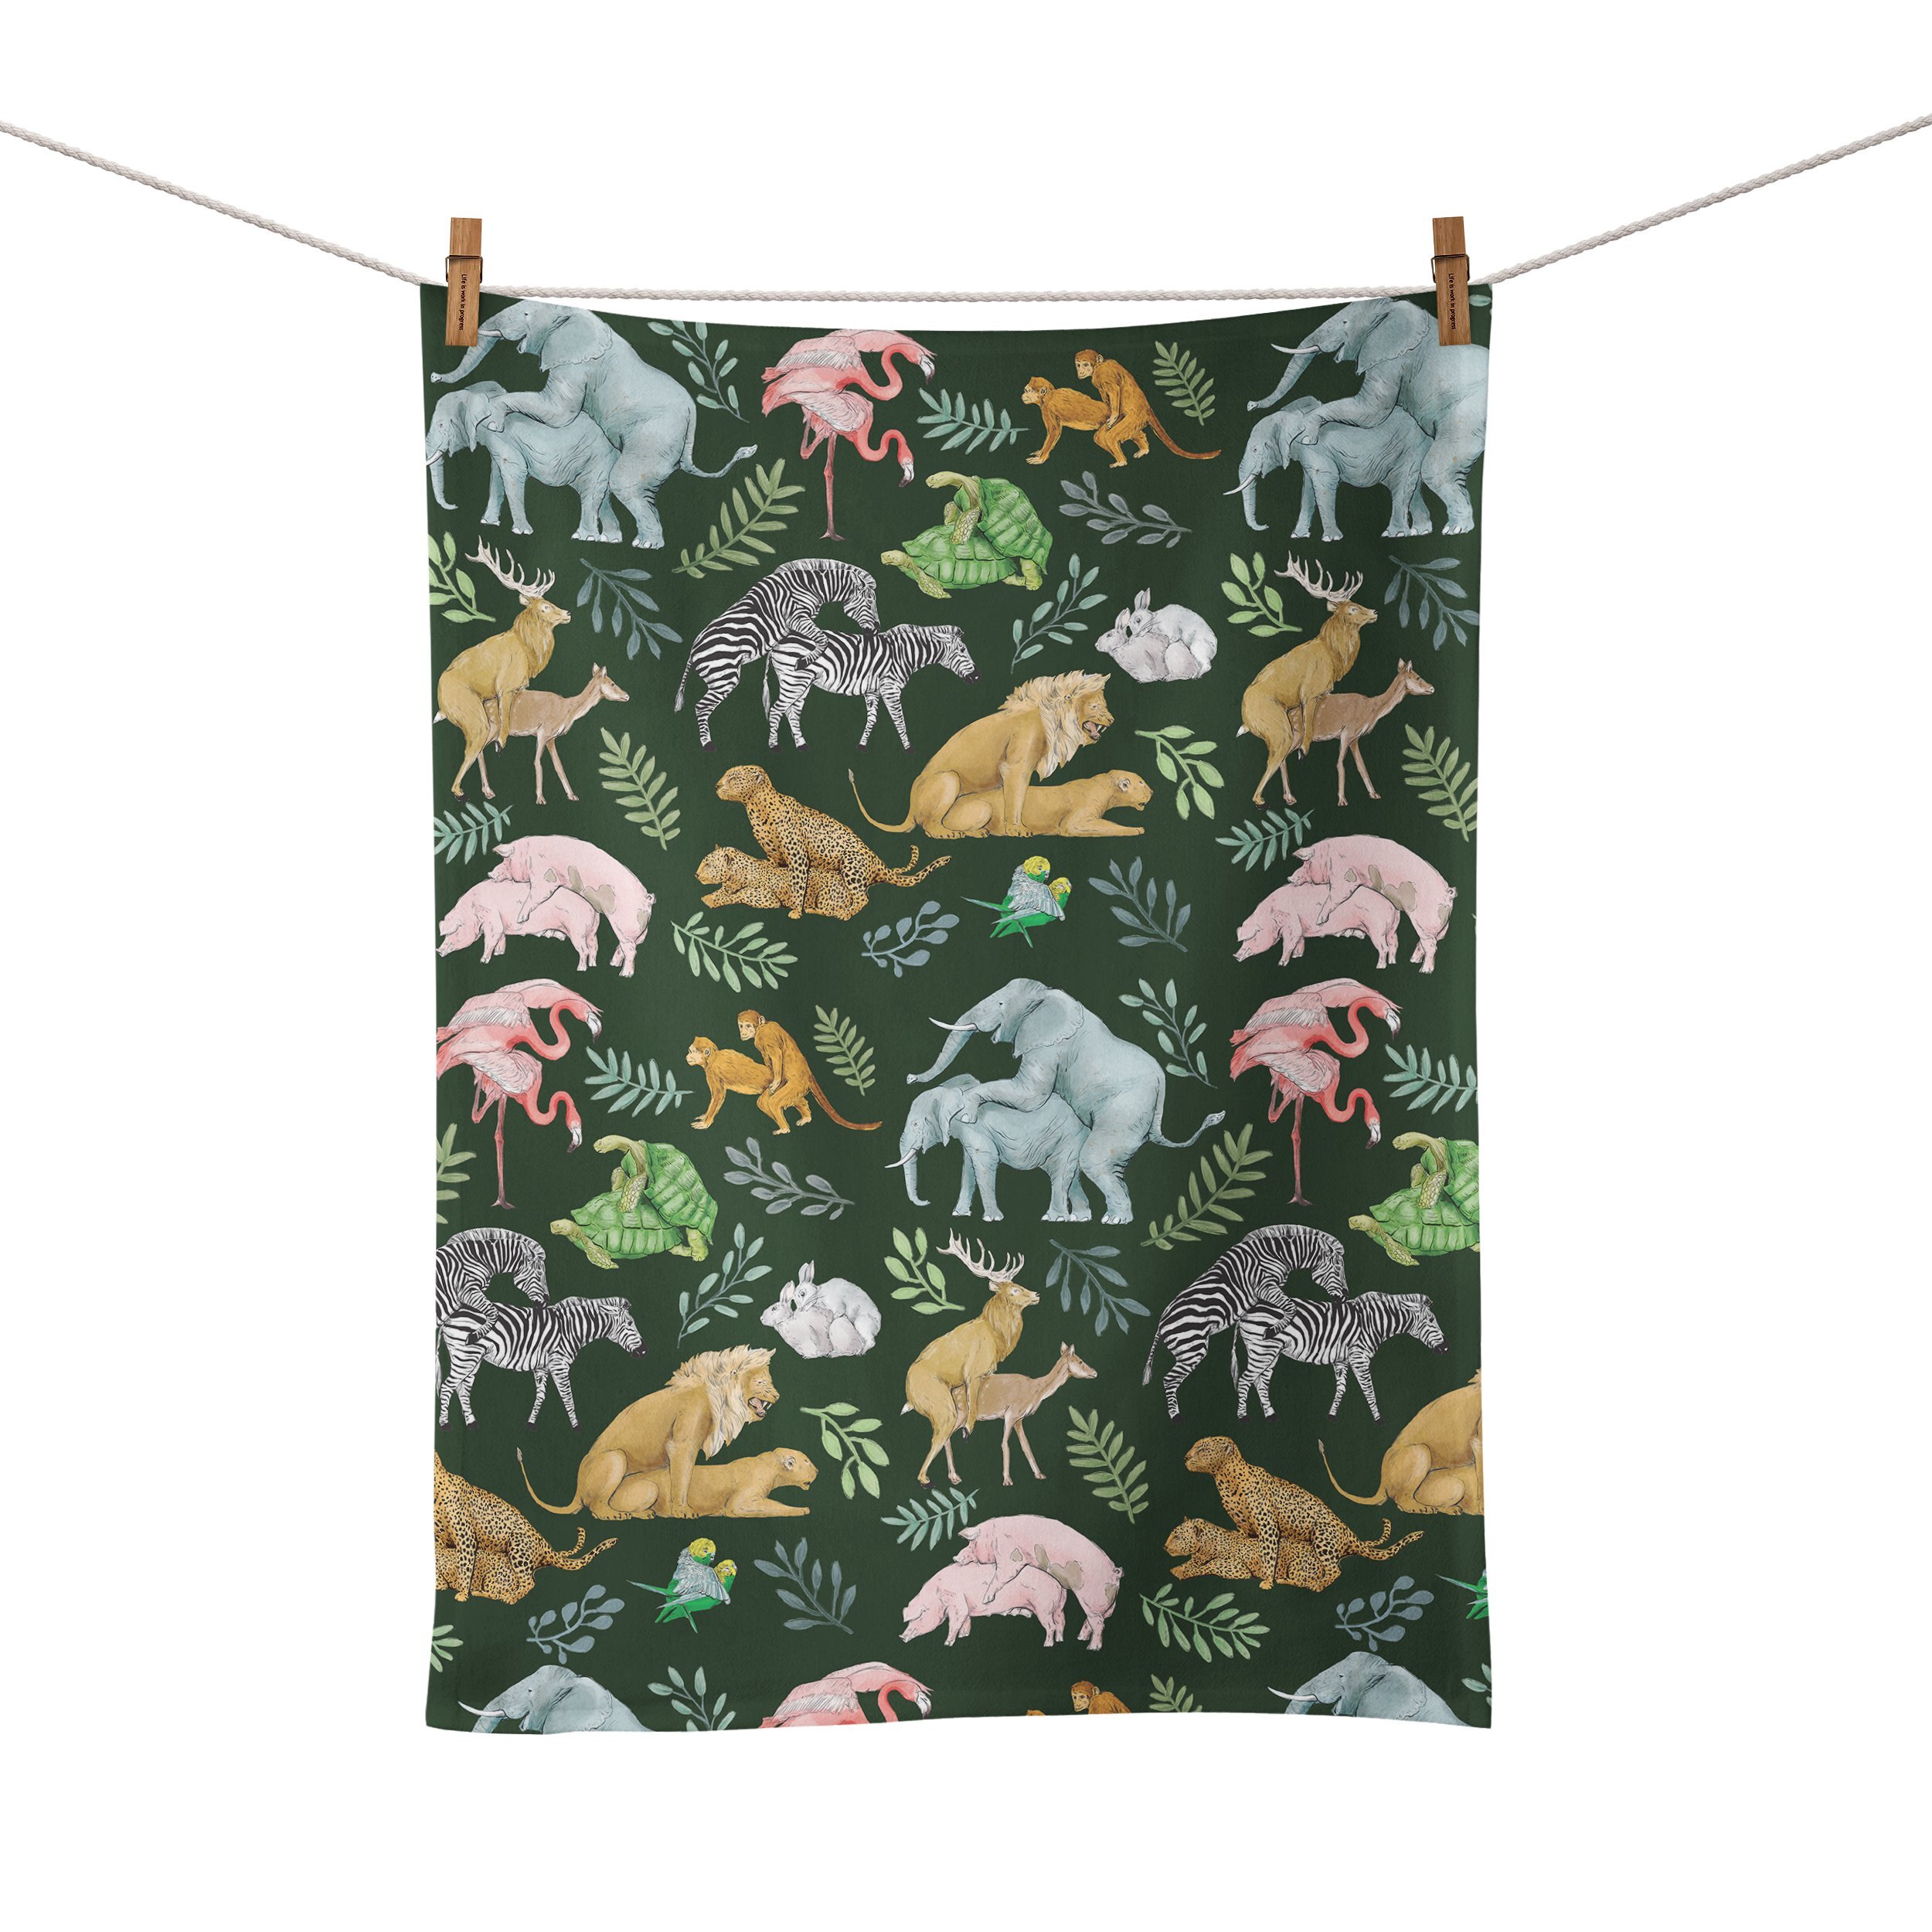
The headline read: ‘MYER HAS TEA TOWELS WITH ANIMALS FUCKING ON THEM, WHICH IS A NICE HOUSEWARMING GIFT’.

https://www.pedestrian.tv/home/tea-towels-animals-myer/

7 News Australia
So, we go again.
Another news syndication saw this article take off, and literally reach VIRAL status in a matter of hours.This time, it was the tea towel that flew out the door, then the mugs, bags and everything else! In fact, the print proved so popular that, to this day, we are running to stay on top of re-stocks across, and continuously looking for new, fun products to add to the collection. Who knew something so ridiculously taboo would end up a best-seller, stamped across everything from memory cards and Valentine’s Day message, to coffee cups and totes, plastered across the internet.
The creators behind the design are Aussie brand La La Land, which sells a range of items including bags, reusable mugs and tea towels in the "Wild Fur You" print.
"A best-selling cheeky Australian themed illustration by our talented in-house artist at La La Land, Lilly Perrott," La La Land's website reads.
"A perfect adult gift to stand against the ordinary."
The artist responsible for the colourful designs, Lilly Perrott, is an in house designer for the brand La La Land and described her style as “creating playful scenes and concepts reflecting pop culture today”.
The artist behind the “steamy” print, Lilly Perrott, actually stocks a similar collection on La La Land. And by similar collection, I mean there’s a mug ($17.95), a clutch ($14.39), and a tote bag ($19.95) with other animals fucking on it.
Designed by Australian artist Lilly Perrott the range is sold on website La La Land and features illustrations with intricate attention to florals and stylised approach to fauna. Lilly draws ‘upon Australia’s finest natives, conjuring up a colourful fusion some of our unique and highly appreciated wildlife, as well as creating playful scenes and concepts reflecting pop culture today.’
So, what’s next on the illustration? Well, it gets a little WILD, and we like to keep you guessing, so be sure to check back soon…

STREETS CLASSICS BUBBLE O'BILL COLLABORATION
An exciting collaboration with Australian ice-cream legends, Streets!

La La Land and I teamed up with Australia's favourite ice cream brand, Streets, to celebrate its famed Bubble O'Bill, through the creation of an exclusively licensed product range. As such, I was delighted to illustrate a series of bags, tea towels and Christmas ornaments, all stocked through La La Land.


Celebrating all things nostalgic with a twist of the famed La La Land quirk, the bright, bubbly and bespoke collection is an ode to Australia's favourite ice cream, and available directly from our La La Land shop.
THE CREATIVE TRIFECTA: ART | ILLUSTRATION | DESIGN
With my imagination, I bring concepts and ideas to life through my illustrations, paintings, and design work. In this article, I explore the grey area of what the difference is between illustration, art & design, and how can they be used together to create something unique and amazing!

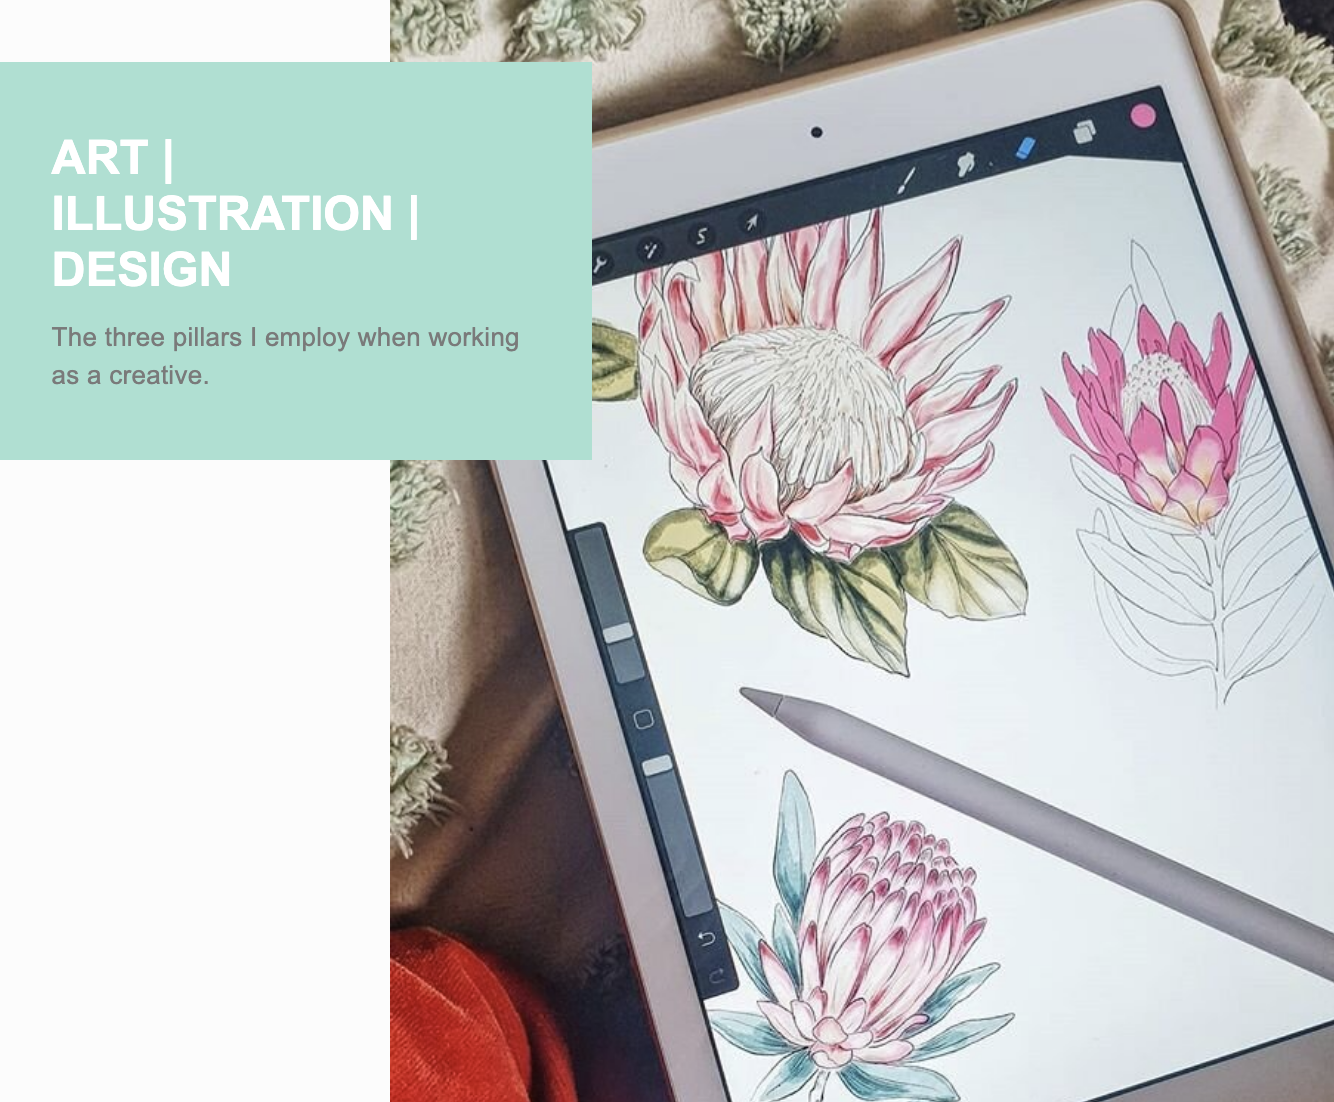
ART | ILLUSTRATION | DESIGN
The three pillars I employ when working as a creative.
Working as a ‘creative’ for eight years in Australia, I can’t count the number of times I have been asked the question, “what do you actually do?”
Truthfully, the answer often stumps me. Not because I don’t have a clear understanding of what the answer is, myself, but because I do so many things that I cannot really condense it down to articulate into one single title.
Instead, I usually find myself answering something along the lines of “I’m an illustrator for a brand, but I also do design, photography, visual marketing, brand collaborations, private commissions and wedding stationary and invites”.
Is there a title for all of those hats? I’ve always thought Art Director was appropriate, but then, I am also the creator of all the art that is being directed. You see my dilemma, and so, I feel like the term ‘creative’ is just a better fit for me.
If you Google the word ‘creativity’ it is defined as:
the use of imagination or original ideas to create something; inventiveness.
That sounds pretty spot on to me! With my imagination, I bring concepts and ideas to life through my illustrations, paintings, and design work.
However, this brings me to my next grey area: what is the difference between illustration, art & design, and how can they be used together to create something unique and amazing?
Yes, they are all creative practices, and yes, they are all grouped into the same industry. But, if I can try to teach my audience one thing, it is that, whilst the three practices are not individually the same, when combined, they create the ultimate trifecta for unique, creative content.
ART: If, like me, you studied art in high school, and possibly did additional theory in your tertiary studies, you’ll know that art is a form of expression, viewed typically in a visual form, such as a painting, sculpture or installation. It produces works to be appreciated primarily for its beauty, subject matter, or emotional power, and can define movements and historic times. A rich understanding of art and its history helps attribute to a better understanding of both illustration and design, and how to use them as tools when developing concepts.
There is also FINE ART, which grows from the idea of capturing more the beauty, power or impact of a subject, but with the main intention to create a piece of finished fine art, often without a deep concept or historical significance. I often get asked to create large paintings to depict the client’s subject matter of choice, simply so they have a piece of art that is aesthetically pleasing, but also unique to them.
Art, to me, is creating something with a developed, personalised skill set that reflects a unique subject matter shaped by the artist’s intentions (often then recorded in the artist’s statement). Lastly, art is not normally created for profit. It’s an idea, executed by the individual, unique to the individual.

FOR EXAMPLE
I painted this still life using acrylic paint on wooden board. The subject matter is a domestic still life scene, which I composed using items that held significance to me, and as the artist, it was important for me to reflect this scene because it summarised a 10-month chapter of my life where I worked on my independence and practised the importance of being comfortable, alone.
This piece of art to someone else may not bear the deeper reason as to why it was created. They may just look at it and think ‘ok, that looks cool - whatever’. And that is, also, totally fine, because all art is subjective.
ILLUSTRATION: This term is not as common as art, but for me, it is the most crucial. Illustration is the tool I use most commercially to bring ideas to life. A creative tool to help communicate concepts through drawing, painting, collage and animation, it depicts an idea, and can be used across a variety of industry examples, including:
Editorial Illustration: An illustrator will create a visual aid that depicts or reflects the subject matter the author writes about.
Commercial Illustration: A brand or client will approach an illustrator to draw artworks based on a brief that help sell a product such as illustrating on fabrics, creating illustrations for homewares and gifts, illustrating concepts for greeting cards and so on.
Book Illustration: Illustrators either write or work with authors and help create visual images that tell the story to the audience through pictures. These are often children’s books, graphic novels, or book jackets.
Scientific Illustration: Again, a visual aid with specialised accuracy to depict the discoveries and studies of doctors and surgeon that are published in text books and hospital/surgery records.
Botanical Illustration: A branch off from scientific illustration that botanists use to classify and showcase plant species that are published in field studies, text books and exhibitions.

FOR EXAMPLE
I was given a brief at La La Land to illustrate a range of artworks that drew on the art style ‘chinoiserie’ which is a European art style. However, La La Land wanted an Australian themed twist. I illustrated several elements and scenes for the range, and designed them to work on a plethora of products, such as coffee cups, annual diaries, bags, and more.
The purpose of this collection was to inspire happiness and creativity through the sale of beautiful products.
Fun Fact: the above illustration examples all share one key thing in common - they are all, eventually, used to be copied and distributed to large audiences. Illustration would not exist without the invention of the printing press in 1440 by the creative inventor, Johannes Gutenberg, establishing an industry where illustration works as a form of communication.
DESIGN: The final pillar of the creative trifecta is design. It’s just as important, because, without it would be complete chaos. Design is the practice of conceiving and planning what doesn't exist. Without good design, your idea can completely flop. It aids in communicating the original creative concept or idea by taking into consideration the following factors:
Line - the use of line weight and texture
Colour - the choice and use of colour through out the artwork
Form/Size/Space - the shapes and layout of the elements within the artwork
Honing in on these points, design is important for illustration to allow for the creator to communicate their ideas and vision whilst allowing the viewer to easily digest the visual information. Carefully paying attention to the use of line, colour, form, size and space will take turn a good piece of work into an AMAZING piece of work.
IN SUMMARY: when I work with clients, or even alone, I use art, illustration and design to develop concepts into reality. Being a creative means you are a visual person and you have a skill that can help people and their businesses share their ideas or visions with the world. Whether it’s designing a homewares range, illustrating a suite of wedding invitations, or painting a large picture - art, design and illustration all come to play significant roles in creating a successful end result.

FREE GUIDE: HOW TO PLAN YOUR WEDDING INVITATIONS FROM START TO FINISH

When it comes to creating your wedding invitations, there is a lot to consider. Whilst there is a large variety of pre-made templates available both online and in store, for many of us, the personal touch of a bespoke designed invitation allows for that little something extra. In addition to the wording and aesthetic, other factors you should think about include how you will extend the invite, and whether you will be having a separate ceremony location to the reception. Do you plan to have a gift registry, or will you opt for a wishing well, or charity donation? Will your guests need a map, or would you like to share accomodation suggestions? This free guide to creating your wedding invitations is a must-read before you get started, guaranteed to make the process stress free and enjoyable, from start to finish. You’ll also find a selection of additional templates and examples for to help assist you in developing the perfect invitation suite for your special day.
BEFORE YOU BEGIN
Before you begin the design process, you will need to ensure you and your partner have agreed on a location & date for both the ceremony and reception, with a booking confirmed. This confirmation of detail is imperative so as to ensure you prepared to send out the invitations in good time, and correctly list/and illustrate the event location(s).
SHARE YOUR IDEAS
Along with your wedding and reception location, it’s also helpful to your designer to share a mood board showcasing your thought process and design preferences. You can collate this on Pinterest, Instagram, or even using a document with images to create a collage that help illustrate the look and feel you want to be depicted in your invitations, ultimately reflecting your wedding. When doing this, you should think about:
Location: will you be surrounded by tropical beach vibes, lush botanical gardens, the Australian outback, wine country vineyards etc.
Symbols & Motifs: these could be things you want reflected throughout the invitation, such as the flowers you plan to have in your bouquet or in your ceremony and reception styling, or culturally significant symbols, like flags, religious symbols, flora and fauna.
Colour Palette: an idea of the colours you’d liked featured throughout the invitation designs can save a lot of time when finalising your invitations. Deciding on the colours you like and sharing examples of them will help to contribute to the tone your invitations will set, too.
INFORMATION TO INCLUDE IN YOUR WEDDING INVITATIONS
Once you have a good idea of where and when your wedding will be, any adopted themes and how you plan it to look, you will need to make a list of all the information required to be provided to guests. This includes:
LOCATION: the name and address of your wedding venue. Will you have the reception and ceremony in separate locations? if so, be sure to include details on both. Perhaps you might like to share a map with guests to make getting there easier, or, if providing transport, a meeting point for the bus.
DATE & TIME: you will beed to share this for both the ceremony & reception. If you have a lot of activities for the day, consider adding an information card with a rundown of additional events, such as welcome drinks, recovery brunch or simply a wedding day schedule.
DRESS CODE: depending on where you are having the wedding, you may like to specify a dress code, such as cocktail, casual, black tie, or use this opportunity to inform them of expected temperatures to consider when getting ready.
RSVP: when it comes to sharing their attendance, you may choose to have your guests respond to your invitations either online via email, using a dedicated website you set up for your wedding, OR you may want to consider a traditional RSVP card, complete with complimentary stamp. When considering the information for these cards, you will want to understand how many people are coming from each household, whether they can they make all the events you have invited them to, and, if not, which ones they do plan to attend. You will also want information on food allergies or dietary requests for caterers, and may like to include something personalised and fun, like a song request to be played at the reception.
CHOOSING AN INVITATION STYLE
Now that you have all your information around your wedding hashed out, you’ll be able to decide how to best communicate it to your guests. With illustration and design, there are endless possibilities when it comes to bringing your ideas and information to life. Some popular examples can be seen below.

DOUBLE SIDED
This style is perfect for couples who are planning on keeping it small and intimate, and want to direct their guests to RSVP online. Make the most of the invitation’s space by printing on the two sides of the card, and bring it to life with bespoke illustration and design!


A THREE (OR MORE) PIECE SUITE
A sophisticated and informative option for couples who want to share key details alongside a postal RSVP card & additional information card(s), like accomodation, a map, wishing well, recovery brunch etc.

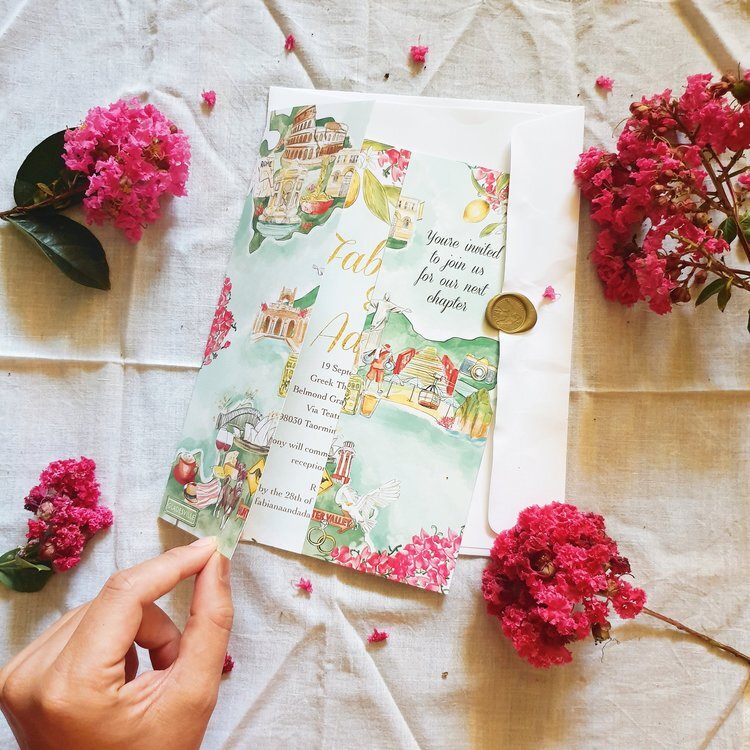
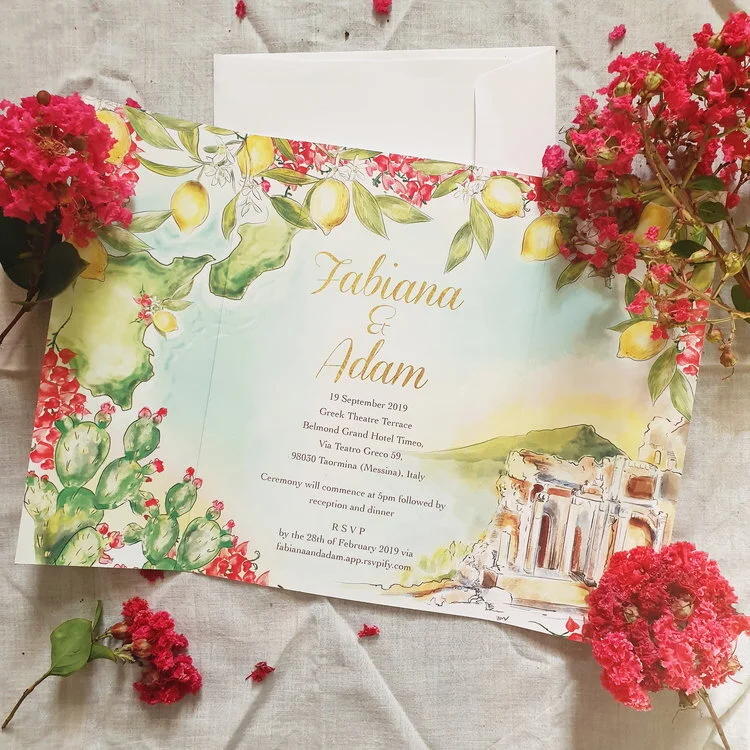

DOUBLE GATE FOLD STYLE
This style is a show stopper! It adds about $40 to your overall printing cost to cut and score the file, but it is so worth it! My personal favourite, it allows couples to include larger illustrations of customised maps, wedding portraits, or beautiful location paintings. The design also allows for four different sections to share information in the one piece of paper: the cover (which opens to) the inner left panel, the middle panel, and the right panel. If you require additional space, you can always include a separate information card or RSVP card to the suite, which fits snuggly within the main invite’s folds.
LASTLY, BUT MOST IMPORTANTLY
It is SO important to proof read the information you write. Imagine a spelling error printed on over 100 invitations after all your hard work! To avoid that, I always run the copy I’ve been supplied with through google doc’s spell check and Grammerly for accuracy, but strongly suggest you do the same, as many destinations and names are not in the dictionary, so may miss being flagged.
LET’S RECAP
Alright, we’re nearly there! Now, it’s time for you to look back and check off the following:
The location, date, and additional wedding information for your designer to work with
Pinterest or mood board that reflects the look and feel you’re after
The style of invitation layout you think will work best for you
Any additional ideas or concepts that may have occurred to you. Most illustrators and designers will be more than happy to develop additional concepts and ideas with you, tailoring your content to your needs
With this information, you should be all set to communicate your ideas, wants and needs to your illustrator/designer of your choice! Put it together in an email or document and get ready to bring your ideas to like.
Want to talk through plans?
Drop me a line at lillymperrott@gmail.com
Blog
Creative musings around illustration and art with a dose of travel and adventure.